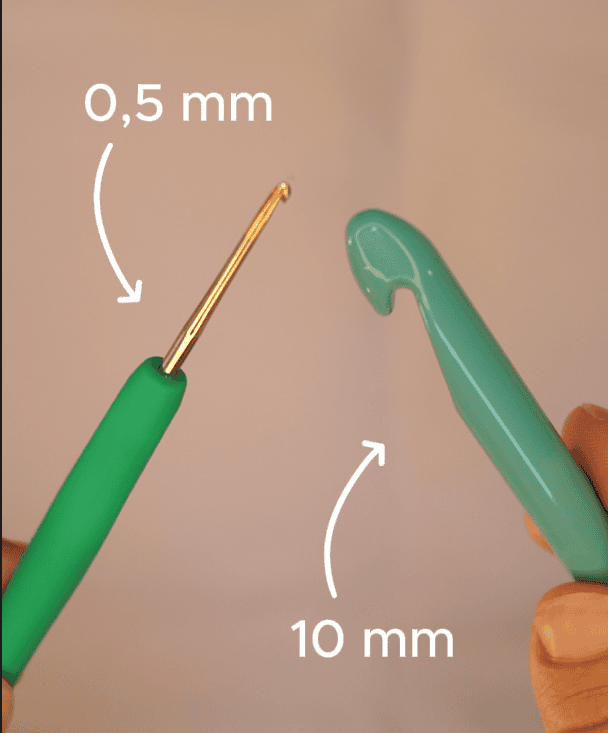
If you are a regular crocheter or knitter, it is almost guaranteed that you have at least one cone, skein, or hank of ultra-thin yarn sitting untouched in the very back of your craft stash. But working with laceweight, cobweb, or thread-weight yarn requires an extraordinary amount of patience, perfect lighting, and hundreds of hours of repetitive motion just to produce a small square of fabric. Consequently, the yarn is relegated to the stash, untouched for years. So if you want to finally use up that beautiful fiber, you need to know how to make thin yarn chunky. Transforming it from a 0.5mm requirement to a sturdy, thick strand ready for a 10mm hook changes everything.
Why Holding Multiple Strands Together is Not a Practical Solution
When searching for ways to thicken fine yarn, the most ubiquitous advice in the fiber arts community is to simply hold multiple strands of yarn together as you work. While holding two strands of fingering weight yarn together to achieve a DK gauge is a perfectly viable and common practice, attempting to scale this method up for thread-weight yarn is a logistical nightmare.
If you need chunky yarn from really thin yarn, holding 5 strands together is just not practical for several major reasons:
- Preparation time: You cannot easily pull five strands from a single cone. You must first use a yarn winder to divide your yardage into five equal, separate cakes. Navigating the math and the winding process alone is incredibly tedious.
- Tension issues: When you knit or crochet holding five independent strands, maintaining equal tension across every single thread is nearly impossible. As you pull the yarn from the cakes, one strand will inevitably go slack while another pulls tight, creating loose, messy loops on the surface of your project.
- Splitting and dropped threads: Every time you insert your crochet hook or knitting needle, you risk catching only four of the five strands. If you miss a thread and fail to notice it immediately, you will have floating threads across your stitches, ruining the clean, modern look of the fabric.
- The nightmare of frogging: If you make a mistake and need to rip back (frog) your work, dealing with five un-plied strands of thin thread almost always results in a massive, unworkable tangle that has to be cut and thrown away.
What is Chainette Yarn and Why Are We Making It?
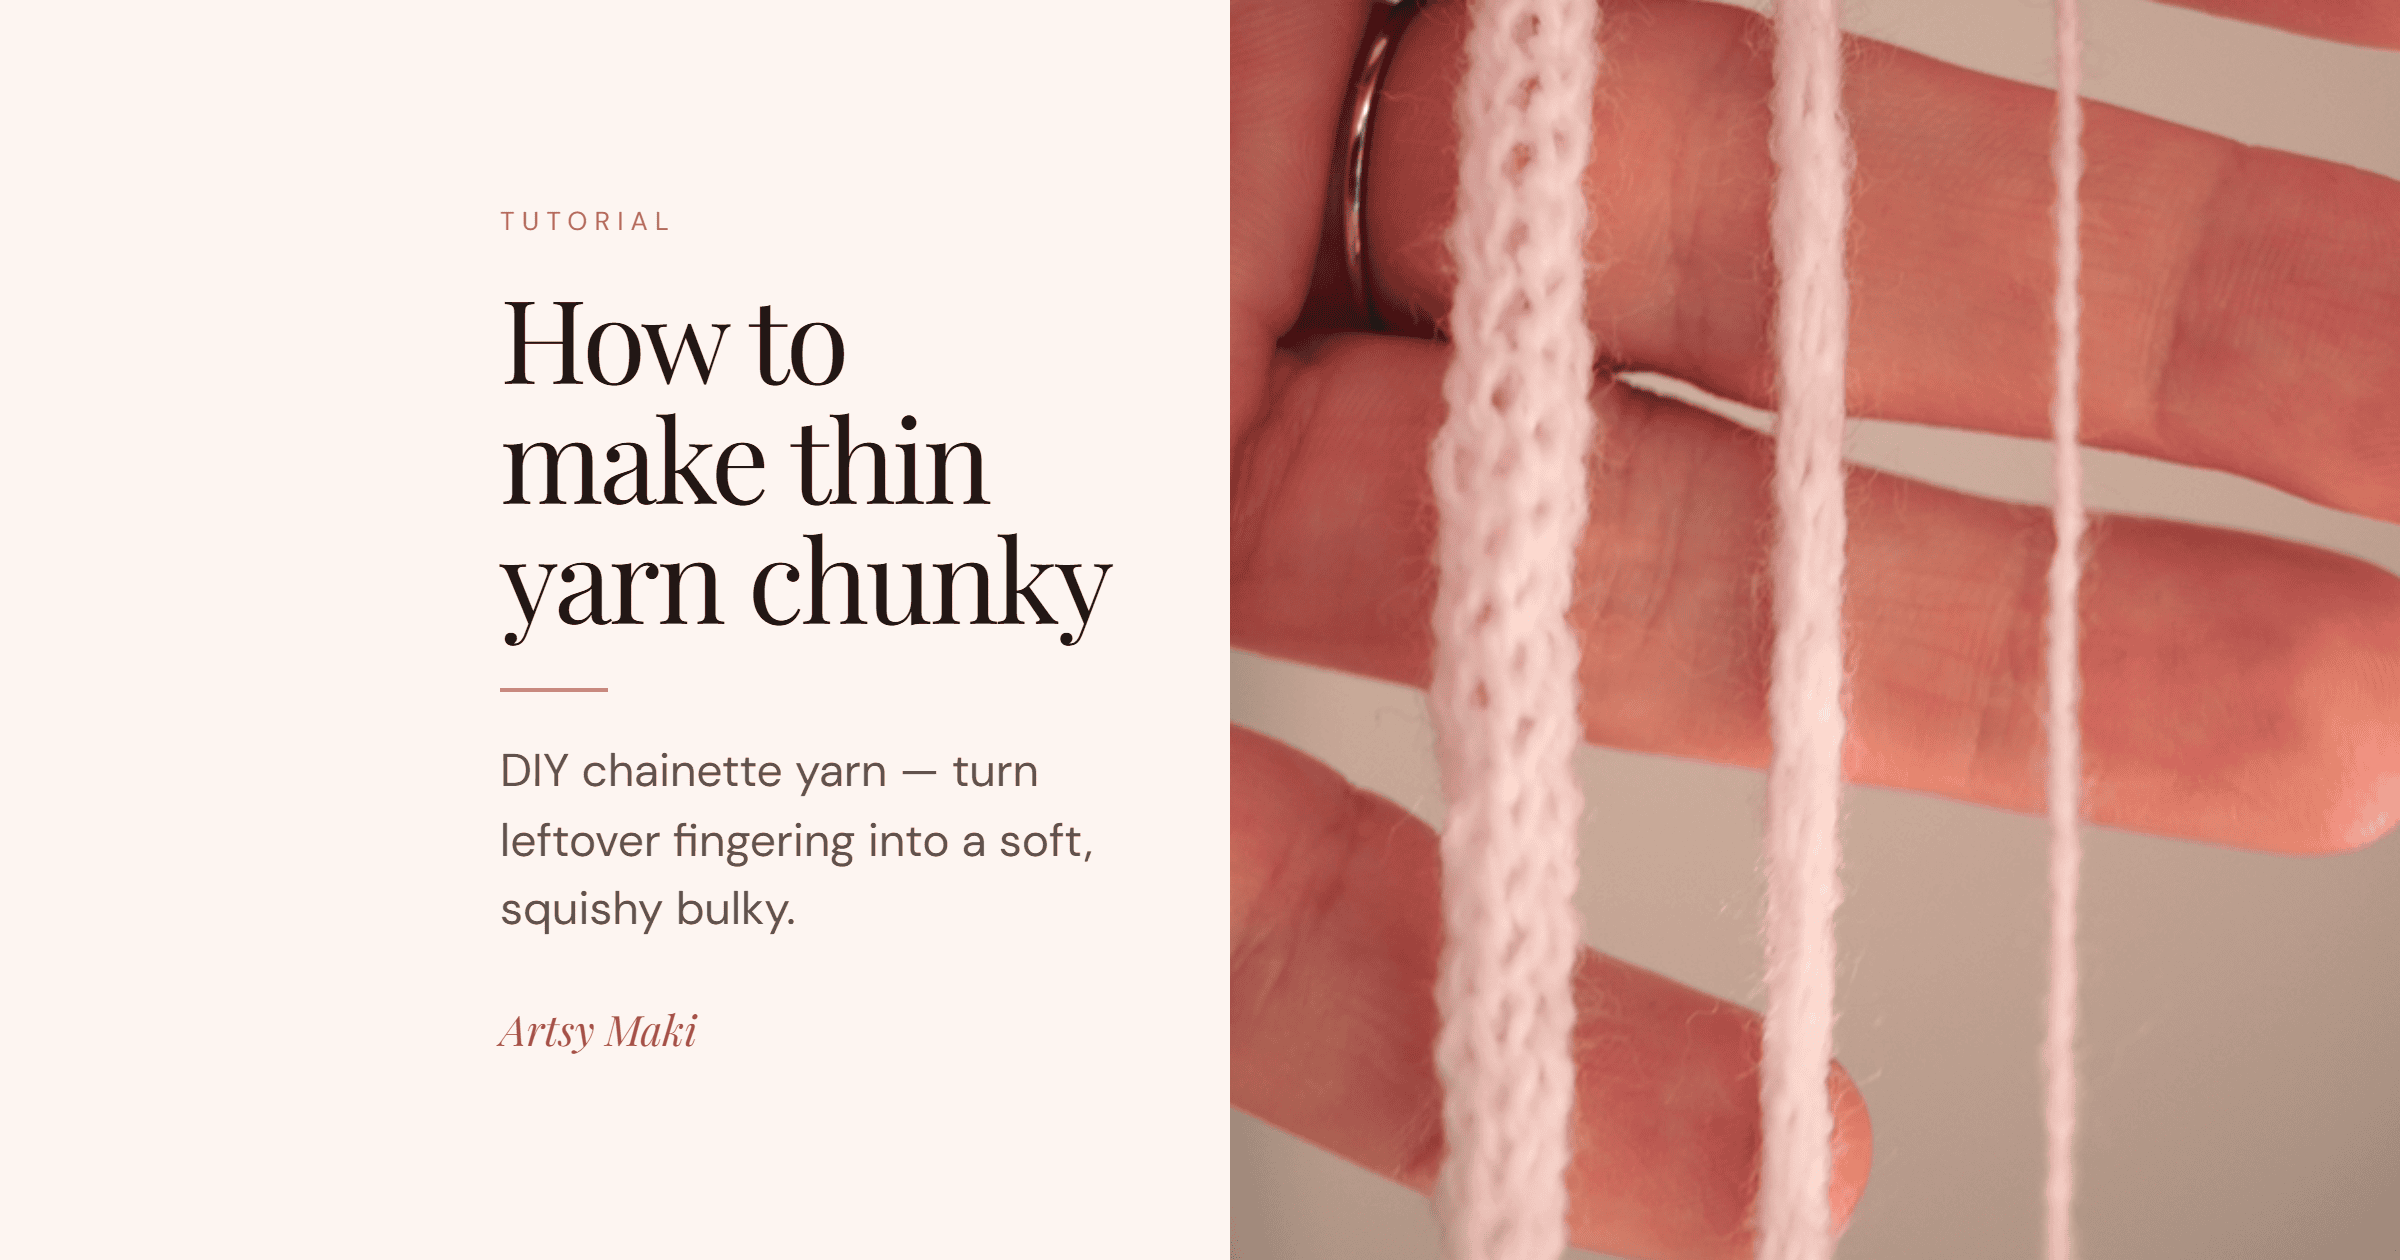
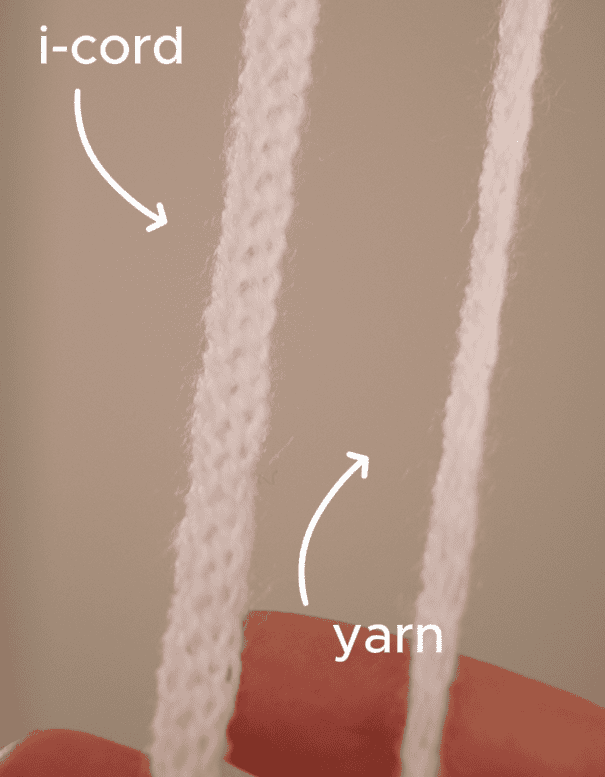
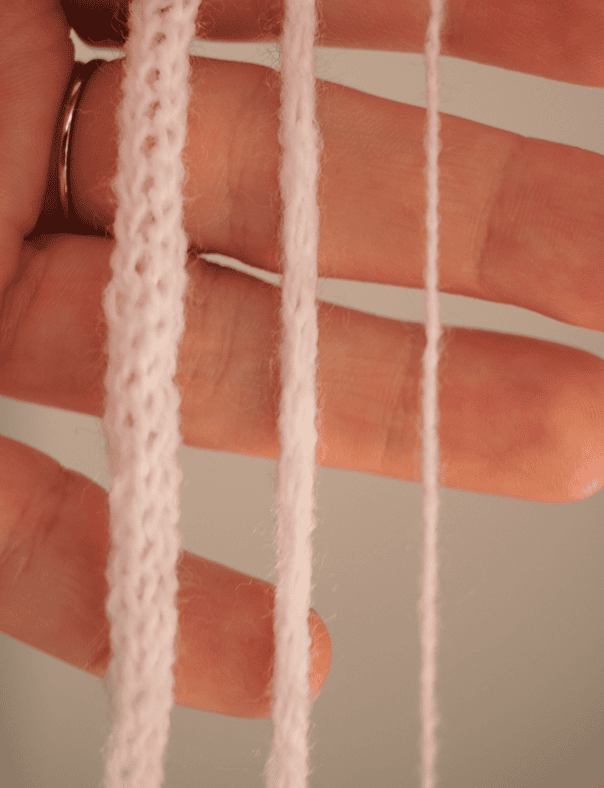
Instead of struggling with multiple loose strands, the most effective solution is to physically construct a brand-new, cohesive yarn out of the thin thread. We achieve this by converting the yarn into an I-cord. An I-cord is a small, continuous tube of stockinette stitch.
By making an I-cord from your thread, you are essentially creating what the commercial yarn industry calls “chainette yarn.” If you look closely at high-end, store-bought chunky yarns, many of them are not spun from a solid, dense mass of wool roving. Instead, they are tiny, hollow knitted tubes. This hollow tubular structure makes the yarn incredibly thick and bulky, but keeps it surprisingly lightweight. A chunky sweater made from a solid, tightly spun yarn can weigh incredibly heavy on the shoulders, causing the garment to stretch and sag over time. In contrast, a sweater made from chainette yarn offers all the luxurious volume with a fraction of the weight. By knitting your ultra-thin yarn into an I-cord, you are replicating a professional, industrial milling process right at your own crafting desk.
What will you need:
While it is technically possible to crochet or knit an I-cord manually, creating the hundreds of meters of yarn required for a garment using manual methods would take longer than simply crocheting with the original 0.5mm hook. To make this yarn transformation fast, efficient, and enjoyable, you will need an iCord mashine.
The perfect solution is an automatic I-cord maker but cheep menual iCord makers will work as well. For this technique, I used the automatic I-cord machine from Caydo. This device features a circular arrangement of small latch-hook needles housed inside a plastic tube. These internal needles do all the intricate knitting mechanically. You simply feed the single strand of thin yarn through the top tensioner, and turn it on. The machine effortlessly processes the single strand and spits out a perfectly uniform, sturdy I-cord at a remarkably fast speed. What would take weeks by hand takes only minutes with this device.
If you want to try this technique and rescue your thin yarn stash, here is the exact machine used in the tutorial: Automatic Knitting Machine.

Step-by-Step Guide: How to Make Thin Yarn Chunky
Step 1: Setup
Both automatic and manual I-cord machines require initial setup. Place your yarn cone so it feeds smoothly. Thread the yarn through the machine’s tension guides. Cast on the first row by slowly turning the handle and alternating the yarn behind and in front of the needles.
Step 2: Making the I-Cord
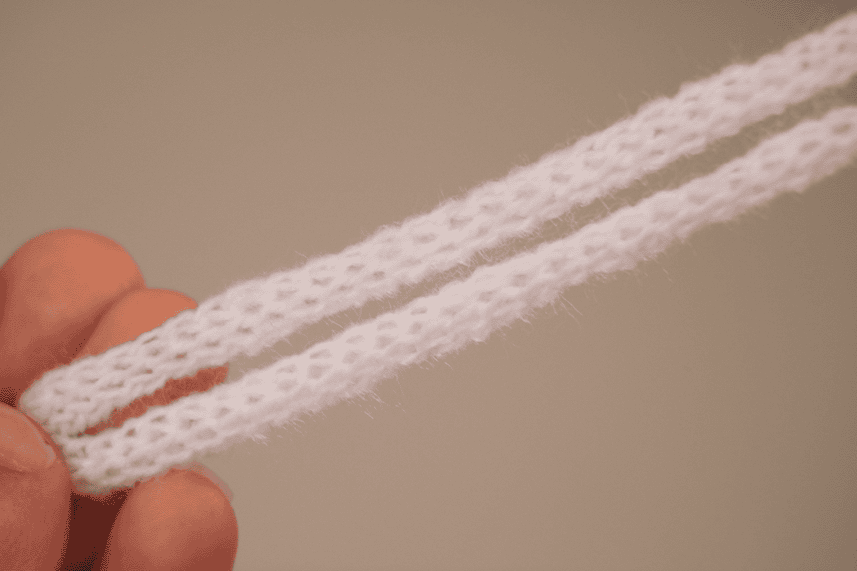
Once the cast-on row is complete, turn the crank continuously or turn on your automatic mashine. The machine will knit the single thin strand into a tubular cord. Continue cranking until you have processed the required amount of yarn. Move the weight up periodically so it does not touch the floor if using manual mashine.
Step 3: Blocking
Freshly make I-cord behaves like a hollow, stiff tube. If used immediately, the final fabric will be rigid. Blocking uses moisture and tension to permanently flatten the stitches, making the cord behave like standard chunky chainette yarn.
- Soak: Submerge the entire I-cord in room-temperature water for 15 to 20 minutes. Press it down to ensure water saturates the core and relaxes the fibers.
- Remove Excess Water: Drain the water and gently squeeze the yarn. Do not wring or twist. Roll the damp yarn in a dry bath towel and press down to absorb the majority of the moisture.
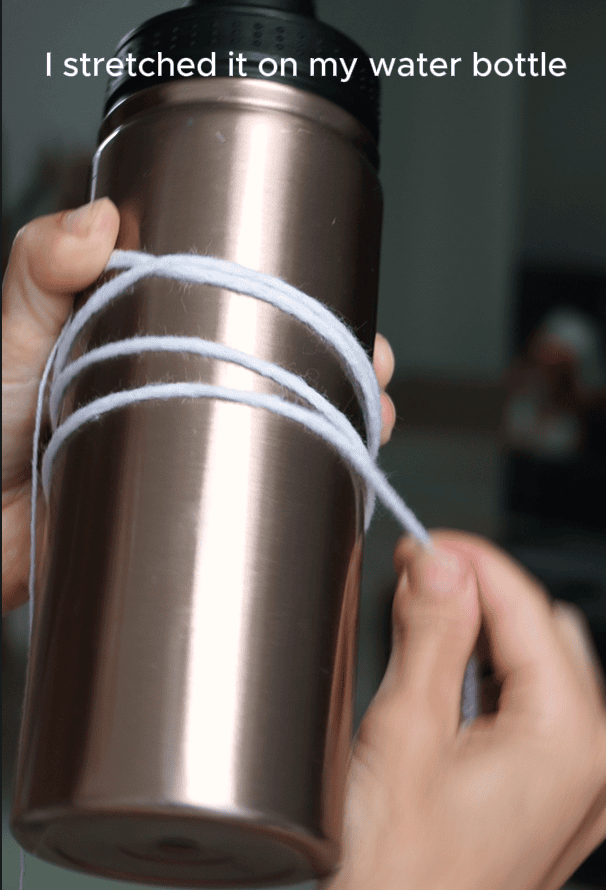
- Stretch and Dry (The Water Bottle Method): To eliminate the tube shape, the yarn must dry under tension. Stretch the damp I-cord and wrap it tightly around a rigid cylindrical object, such as a large water bottle. As it dries in this stretched state, the hollow tube collapses and flattens. Wait until the yarn is completely dry (24 to 48 hours) before unwinding it.
What Fibers Work Best for This Technique?
It is important to recognize how different fiber profiles react to the I-cord machine and the subsequent blocking process. Natural animal fibers, such as merino wool, alpaca, and mohair blends, possess excellent natural “memory.” They will respond beautifully to the soaking and stretching process, permanently blocking into the flattened chainette shape and retaining that shape beautifully. Natural plant fibers like cotton, bamboo, and linen also feed through the machine smoothly and block exceptionally well, yielding a crisp, clean chunky yarn that is perfect for accessories like structured bags, and modern home decor.
If your ultra-thin yarn is made of 100% acrylic, standard wet blocking will not permanently alter its tubular structure. Acrylic is essentially a plastic fiber, and it does not have natural memory that responds to water. To permanently flatten an acrylic I-cord, you must apply controlled heat to gently melt and reset the plastic fibers—a process known as “killing” the yarn. You can achieve this by carefully hovering a hot garment steamer over the stretched cord, ensuring the metal element never actually touches the yarn. Even without heat blocking, simply wet-stretching an acrylic I-cord will still drastically improve its workability and ease the stiffness compared to the raw tube.
Why You Will Love Working With Your New Chunky Yarn
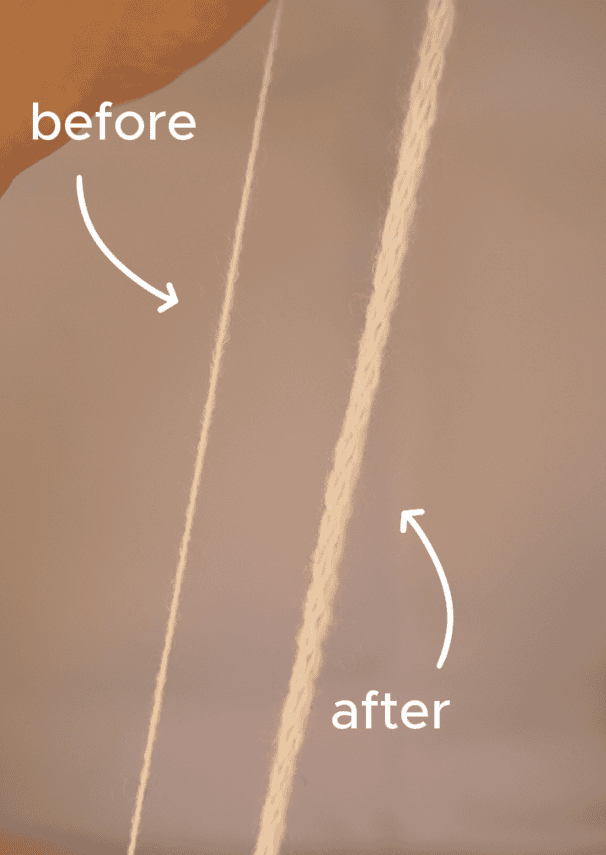
When you compare the original 0.5mm thread to the final blocked chainette yarn, the transformation is stunning. It is undoubtedly the best way to finally use up all that thin yarn sitting in your stash and turn it into something highly functional.
When you transition to crocheting or knitting with this newly transformed yarn, the tactile experience is vastly improved. Because the yarn is a cohesive, mechanically interlocked tube rather than a collection of loosely plied strands, it is structurally impossible for your crochet hook or knitting needles to split the yarn. Your stitches will have phenomenal, crisp stitch definition, allowing textures like alpine stitch, waffle stitch, cables, and ribbing to stand out prominently. A cone of thread that would have taken endless months to work through can now be utilized with a 10mm hook to create a modern, chunky sweater, a squishy blanket, or a durable tote bag over the course of a single weekend.
Watch the Process in Action
Seeing the I-cord machine operate and witnessing the visual difference of the blocking process makes this hack incredibly easy to replicate. Watch this short video tutorial to see exactly how to take your yarn from an ultra-thin thread to a beautiful, workable chunky yarn: