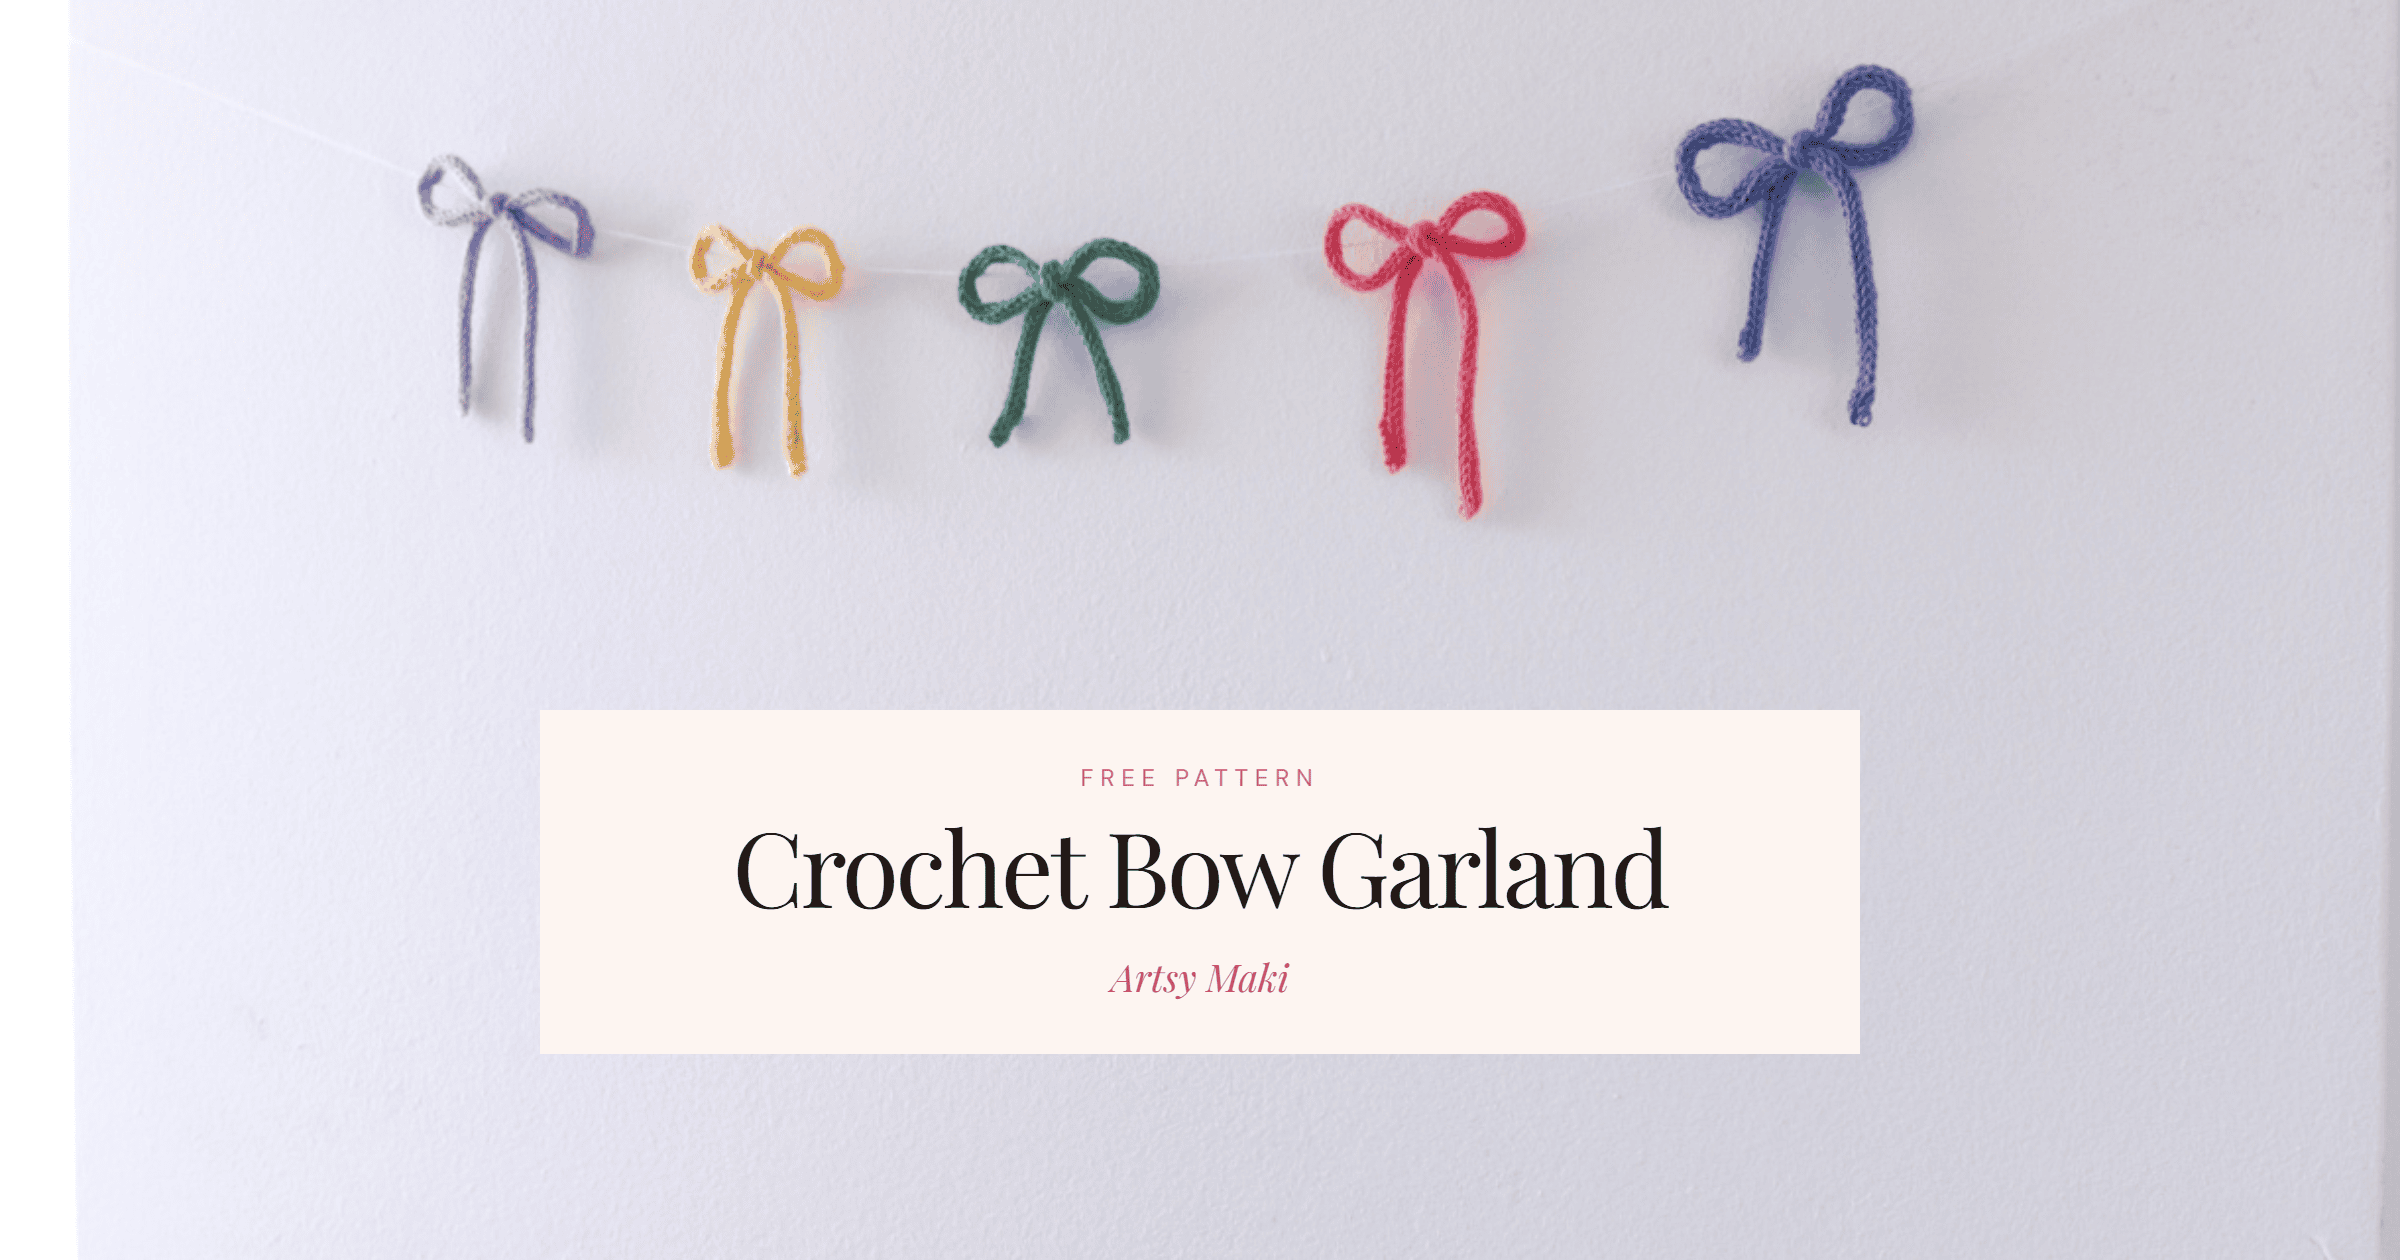
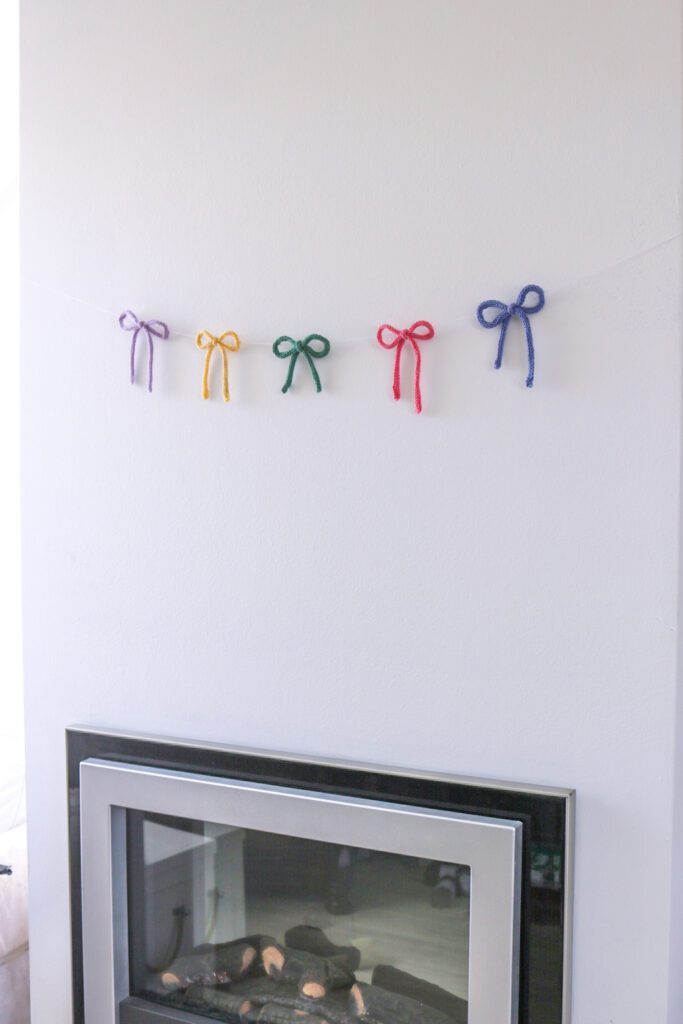
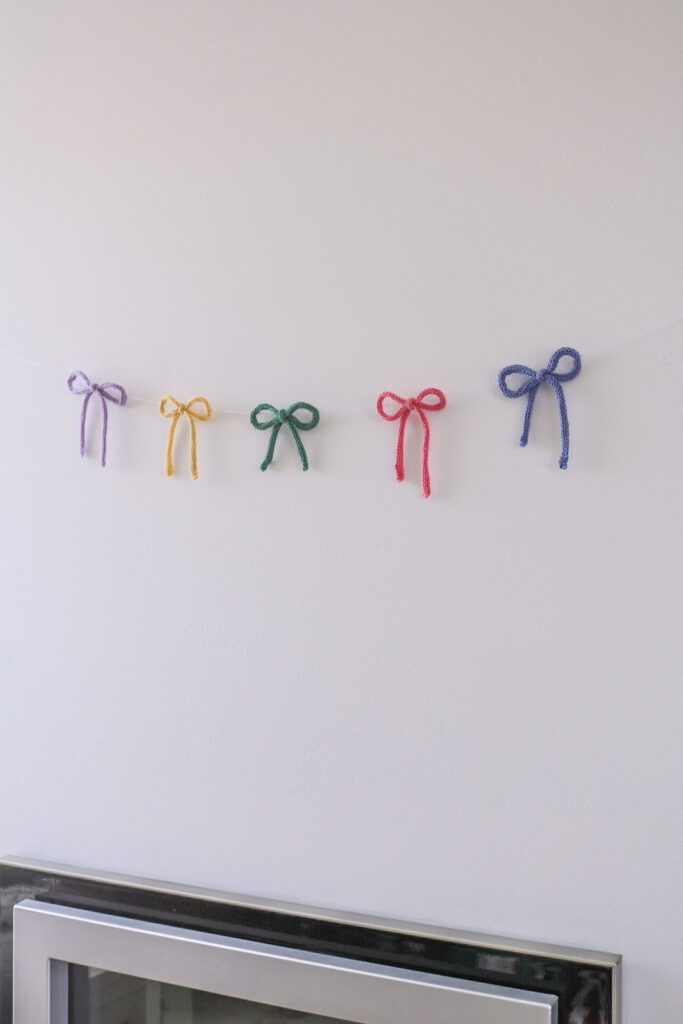
This is the kind of project I like best. It uses up the scraps that are too small for anything, it takes an evening rather than a weekend, and it looks so cute. Five little bows on a thread, and a bare wall suddenly has something on it.
The whole thing is made from i-cords, tied into bows with a trick that takes about three seconds once you have it, then strung on a thin thread that disappears against the wall. No pattern to follow, no gauge to match, and nothing to sew.
Before you start
The short version
- Make one 40 cm (16 in) i-cord per bow, in whatever colours you have.
- Weave the ends in before you tie anything.
- Tie each cord into a bow using the two-loop trick below.
- Thread them onto a thin yarn the same colour as your wall.
- Pass through each bow twice so it cannot slide along the thread.
- Scraps are genuinely enough. Each bow uses only a few metres.
What you need
- Yarn scraps in a few colours. I used DROPS Safran, a sport weight cotton, in five colours. Any yarn works.
- A thin yarn in the colour of your wall for the garland thread. Matching thread to your wall makes the bows look like they are floating.
- A yarn needle.
- Something to make i-cords with. A i-cord machine, knitting needles, a knitting spool or a crochet hook. All four are covered below.
How much yarn? Each 40 cm cord takes only a few metres, roughly five. A single 50 g ball of Safran holds 160 m, so one ball would make around thirty bows. Measure your first cord and you will know exactly what yours takes.
How many bows? I made five. I spaced them 6 cm (2,3 in) apart and one bow is 8 cm (3,1 in) from side to side so my finished garland is about 60 cm (23,6 in).
Step 1: Make the cords
You need one cord per bow, each 40 cm (16 in) long. That length gives a bow of a nice hand size with tails that hang properly. Longer cords give bigger, looser bows, so make one and see before you commit.
An i-cord is a narrow knitted tube. There are four ways to get one, and they all end up looking much the same.
The fast way: an i-cord machine
That link is an affiliate link. If you buy through it I earn a small commission at no extra cost to you. I only link to things I actually use.
I used the Caydo electric i-cord machine and it made these in a couple of minutes each. You feed the yarn in, it runs on a motor at up to 60 cm a minute, and a finished cord comes out the bottom. For a project that needs five identical cords it is very satisfying, and if you make a lot of drawstrings, straps or handles it pays for itself in patience.
It takes smooth yarns roughly in the sport to worsted range, which is why Safran works well in it.
You absolutely do not need one. Here is how to make the same cord by hand.
By hand on knitting needles
This is the classic four stitch i-cord and it is the closest match to what the machine produces. You need two double pointed needles.
- Cast on 4 stitches.
- Knit all 4 stitches.
- Do not turn the work. Slide the stitches back to the other end of the same needle.
- Bring the working yarn firmly across the back and knit all 4 again.
- Repeat steps 3 and 4 until the cord measures 40 cm. It will start as a flat strip and curl itself into a tube after ten rows or so, which is normal.
- Cut the yarn, thread the tail through all 4 stitches, and pull tight.
The one thing that goes wrong here is a loose ladder up the back. Pull that first stitch of every row tighter than feels right and it closes up.
By hand on a knitting spool
A four peg knitting spool, sometimes sold as French knitting or a knitting doll, is the hand powered version of the machine and costs very little. Children’s craft shops have them.
- Drop the yarn tail down through the middle of the spool and hold it there.
- Wrap the working yarn once around each peg, going round in one direction.
- Lay the working yarn above the existing loop on the first peg.
- Lift the lower loop up over the working yarn and off the peg. That is one stitch made.
- Move to the next peg and repeat, going round and round. Tug the tail down through the middle every so often.
- To finish, cut the yarn, lift each loop off its peg onto the tail, and pull tight.
If you would rather crochet
You can crochet the cords instead, and I have a full tutorial for it already: the crochet 2 stitch i-cord but heres the short version.
- Ch 4. Insert hook into 2nd ch from hook, yarn over and draw up a loop, insert hook into next ch, yarn over and draw up a loop (4 loops on hook).
- Row 1: Drop 3 loops from hook. Hold onto the dropped loops with your non-hook hand so they don’t come undone. Yarn over and draw through remaining loop on hook. Insert hook into first dropped loop, yarn over and draw through (3 loops on hook). Insert hook into second dropped loop, yarn over and draw through (4 loops on hook).
- Repeat Row 1 till i-cord is 40 cm (16 in). Cut yarn, leaving a long yarn end. Draw end through all 3 loops on hook and pull tight to fasten off.
A crocheted cord comes out slightly flatter and more oval than a knitted one rather than perfectly round. For bows that is completely fine, and arguably better, because a flatter cord sits nicer when it is tied.
Step 2: Weave in the ends now, not later
This is the step people skip and then regret, so it gets its own heading.
Weave both tails back down inside the tube of the cord before you tie anything. Thread the tail on a yarn needle, push it into the open end of the cord, run it along the inside for a few centimetres and out through the side, then trim.
Once a cord is tied into a bow the ends are trapped in the middle of a knot, and weaving them in there is fiddly and tends to distort the shape you just made. Two minutes now saves a lot of annoyance.
Step 3: Tie the bows
This is the part that looks like magic. It is one motion, both hands at once, and no wrapping one tail around the other.
- Hold one end of the cord trapped against your palm with your little finger.
- Put that hand in a slingshot shape, thumb and index finger up and apart.
- Wrap the cord around the outside of your thumb and index finger, so a loop sits across the gap between them.
- Do exactly the same with the other end in your other hand, mirrored.
- Now bring your hands together and take each loop through from the opposite side, so they swap places through the middle.
- Pull both loops away from each other. The knot closes and you have a bow.
If the hand description is hard to follow, here is a video.
Do this for every cord before moving on. Fiddle with each bow until the two loops are even and the tails hang the same length, because once they are on the thread you will not want to untie them.
Step 4: Thread the bows onto the garland
Cut your thin yarn to the length you want the garland to be, plus a generous amount at both ends for hanging and for adjusting. Longer than you think. You can always trim it.
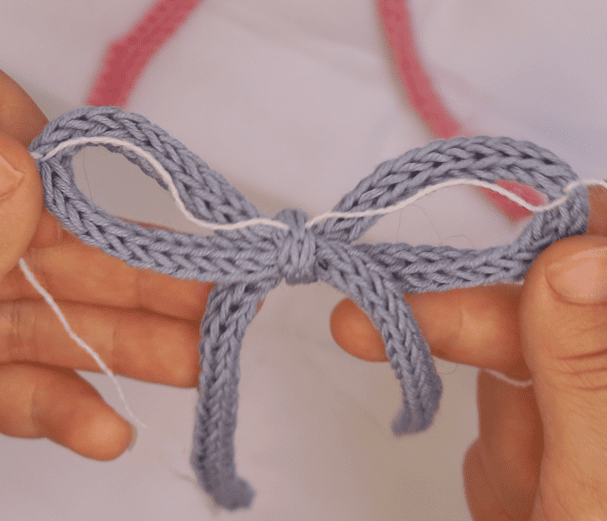
Thread it on a needle. For each bow, the thread travels through three points: the left loop, the centre knot, then the right loop.
The important detail is how many times you go through each one:
- Left loop: go through twice. Pass the needle through, then come back and pass through the same spot again, leaving a small loop of thread sitting around the bow loop.
- Centre knot: go through once. Straight through the middle of the bow.
- Right loop: go through twice again, the same way as the left.
Those doubled passes are what stop the bow sliding along the thread. A single pass lets every bow drift down to the middle the moment you hang it up, which is exactly the problem this solves.
Step 5: Space them out
Move along the thread to where you want the next bow and repeat the same three point sequence. Before you make the second pass at each loop, slide the bow along and check the spacing against the ones already on, because that second pass is what locks it, but you can still udjust it after that.
Work along the whole thread until all your bows are on. Hold the garland up by both ends every couple of bows and look at it, since spacing that looks right flat on a table often looks uneven hanging.
Maki’s tip
Lay all your bows out on the floor in the order you want before you thread a single one. Five colours have more possible arrangements than you would guess, and it is much easier to swap two around now than after they are anchored. I moved mine three times.
Video
Hanging it up
Two small removable adhesive hooks at either end are enough. The whole garland weighs almost nothing, so you do not need anything that makes a hole in the wall.
Let it dip slightly in the middle rather than pulling it drum tight. A little sag looks deliberate and a taut string looks like washing.
If your thread really does match the wall, the bows read as floating, which is the entire trick and the reason I would not use a contrasting string.
Ways to change it
- One colour instead of five. All cream or all white is calmer and reads as much more expensive.
- Thinner or thicker i-cord. For smaller or bigger bow.
- Vary the cord length. Alternate 35 cm and 45 cm cords for bows of different sizes along the same thread.
- Try mohair.
- Make it seasonal. Reds and greens for winter, pastels for spring. It comes down in one minute, which is the nice thing about it.
- Skip the garland. A single bow on a shorter thread makes a gift topper that the person can keep, and they are quick enough to make a pile of.
- Use it as a cake topper or a curtain tie. The cords are useful well beyond this project.
Questions I get asked
Do I need an i-cord machine to make this?
No. A machine is faster and gives very even cords, which is nice when you need five the same, but knitting needles, a knitting spool or a crochet hook all give you a perfectly good cord. The finished garland looks the same.
What yarn is best for a crochet bow garland?
A smooth cotton in sport or DK weight. Cotton holds a crisp bow, and smooth yarn shows the cord shape. Avoid anything very fuzzy, since the halo hides the bow.
How long should the cords be?
40 cm, which is about 16 in, gives a bow that sits nicely in the palm of your hand. Make one first and tie it before you make the rest, because the right length is a matter of taste and it is easy to adjust at that point.
Why do my bows keep sliding along the thread?
You have gone through each loop once instead of twice. Going back through the same spot a second time leaves a small loop of thread that grips the bow and holds it in place. It is the whole reason for the doubled pass.
My bow keeps collapsing when I pull it tight. What am I doing wrong?
You are almost certainly pulling the tails rather than the loops. At the end of the tie, take hold of the two loops and pull those away from each other. The tails are only there to hang.
Can I use this as a Christmas garland?
Yes, and it works very well in reds, greens and creams, or all in white for something quieter. Because it hangs on two adhesive hooks it goes up and comes down in a minute, so it is easy to have a seasonal set.
How do I wash it?
Do not, if you can avoid it. Washing will relax the bows and you would need to retie them. A shake and the soft brush attachment on a vacuum handles the dust, which is all a wall hanging really needs.
Made one?
I would genuinely like to see it, especially the colours you picked. Tag me on Instagram and I will share it.
More small projects
If you like the bow, I have a few patterns built around the same shape, all of them quick and all of them scrap friendly.