You made the swatch. You used the yarn the pattern asked for and the hook the pattern asked for. You counted, and you got 17 stitches where the pattern wanted 15. So either you are crocheting wrong, or the pattern is wrong, and neither of those is true.
Here is the short answer. Gauge is not a property of the yarn and the hook. It is a property of you, the yarn and the hook together, and the designer is a different person with different hands. Nobody expects your handwriting to match theirs. The hook size printed in a pattern is not an instruction, it is the designer’s own starting point, and your job is to find the hook that gets you to their number.
That part is well known and it is where most posts stop. The useful part is everything after it: how far off is actually too far off, how to measure so the number is worth trusting, how to get to the right hook in one jump instead of four, and what to do about row gauge, which the hook barely fixes at all.
If you only read one box
The short version
- Half a stitch per 10 cm is not a rounding error. On a 100 cm (39½ in) chest it is about 3 cm (1¼ in). One whole stitch is about 6 cm, which on most size charts is a full size.
- Change the hook, never your tension. Trying to crochet looser lasts just couple of rows.
- The hook you need is roughly your hook × (your stitches ÷ the pattern’s stitches). It gets you close in one try.
- Measure over 20 cm (8 in) and halve it. Measuring over 10 cm doubles your own counting error.
- Ignore the letter on the hook. A US G is 4 mm on one brand and 4.25 mm on another.
- Row gauge is not a hook problem. It is set by how high you pull up the first loop, the golden loop, and you fix it there.
How far off is too far off?
This is the question nobody answers with a number, so here is the number.
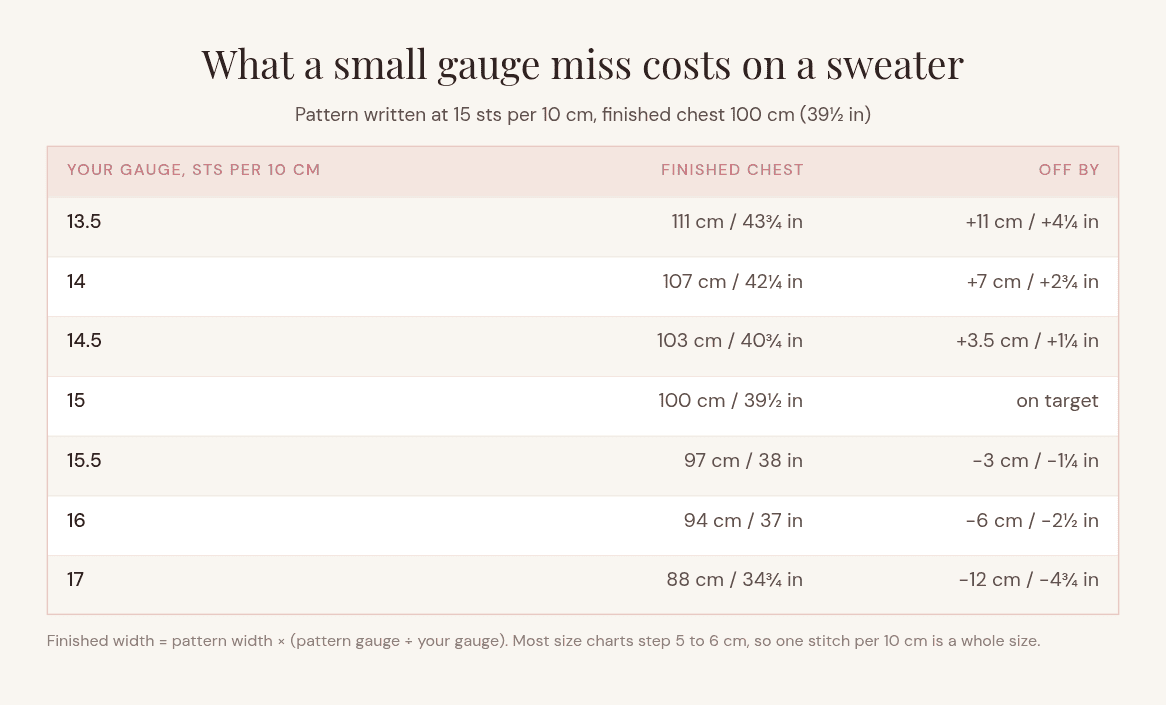
Your finished width is the pattern’s stitch count divided by your own stitches per centimetre. Turn that around and you get a formula you can use on any pattern:
your finished width = pattern width × ( pattern gauge ÷ your gauge )
The table below runs that for a pattern written at 15 stitches per 10 cm with a 100 cm (39½ in) finished chest, which is roughly a size M in most charts including mine.
| Your gauge | Finished chest | Off by |
|---|---|---|
| 13.5 sts | 111 cm / 43¾ in | +11 cm / +4¼ in |
| 14 sts | 107 cm / 42¼ in | +7 cm / +2¾ in |
| 14.5 sts | 103 cm / 40¾ in | +3.5 cm / +1¼ in |
| 15 sts | 100 cm / 39½ in | on target |
| 15.5 sts | 97 cm / 38 in | −3 cm / −1¼ in |
| 16 sts | 94 cm / 37 in | −6 cm / −2½ in |
| 17 sts | 88 cm / 34¾ in | −12 cm / −4¾ in |
Now put that next to a real size chart. The Claire Sweater grades 93, 98, 103, 108 and 114 cm through the middle of its range, so the step between one size and the next is 5 to 6 cm.
Which means: being one stitch per 10 cm off is the same as making a different size. Half a stitch off is half a size. That is the honest scale of the thing, and it is why a swatch is worth an hour on a garment and genuinely does not matter on a scarf.
It also tells you where to relax. If you are making something with a tie back, an adjustable closure or a lot of positive ease, half a stitch will disappear into the fit. If you are making something fitted, it will not.
Six reasons your number is not the designer’s
In rough order of how often each one is the actual culprit.
1. You and the designer measured different fabric
Most patterns do not say whether their gauge is before or after blocking. Blocking means wetting or steaming the finished fabric and letting it dry in shape. Some fibres barely move when you do it and some change a lot, so a number measured straight off the hook and a number measured after a wash can be two different numbers for the same swatch.
Dora Does puts it well in her explanation of gauge: it “can dramatically change when you block your work, or it can barely change at all depending on the stitch and fibre”. There is no universal percentage, which is why I do not trust the ones you see quoted.
If the pattern does not tell you, treat the swatch the way you will treat the garment and measure it after. That is the version that has to fit.
2. The hook is not the size you think it is
This one is genuinely not your fault. On the Craft Yarn Council hook chart, a US G is listed twice: G-6 is 4 mm and plain G is 4.25 mm. A US I appears as 5.25 mm and as I-9 at 5.5 mm. Two hooks, same letter stamped on the handle, a quarter of a millimetre apart.
The Council’s own instruction is blunt: “Because letter and number sizing vary from company to company, rely on the package millimeter (mm) sizing, which is an accurate measurement.”
So if a pattern gives you a letter and you reach for the letter, you can be a quarter millimetre out before you have made a single stitch. Work in millimetres, always, and if a pattern only gives you a letter, look it up on that chart rather than guessing.
I also found that different hook brands an have different sized hooks even if they are supposed to be the same number of mm.
3. You swatched in the wrong stitch
A gauge is only a gauge in the stitch it was measured in. Double crochet, half double crochet and a textured stitch on the same hook and the same yarn give you three different numbers, and the more the stitch pulls in or opens out, the bigger the gap.
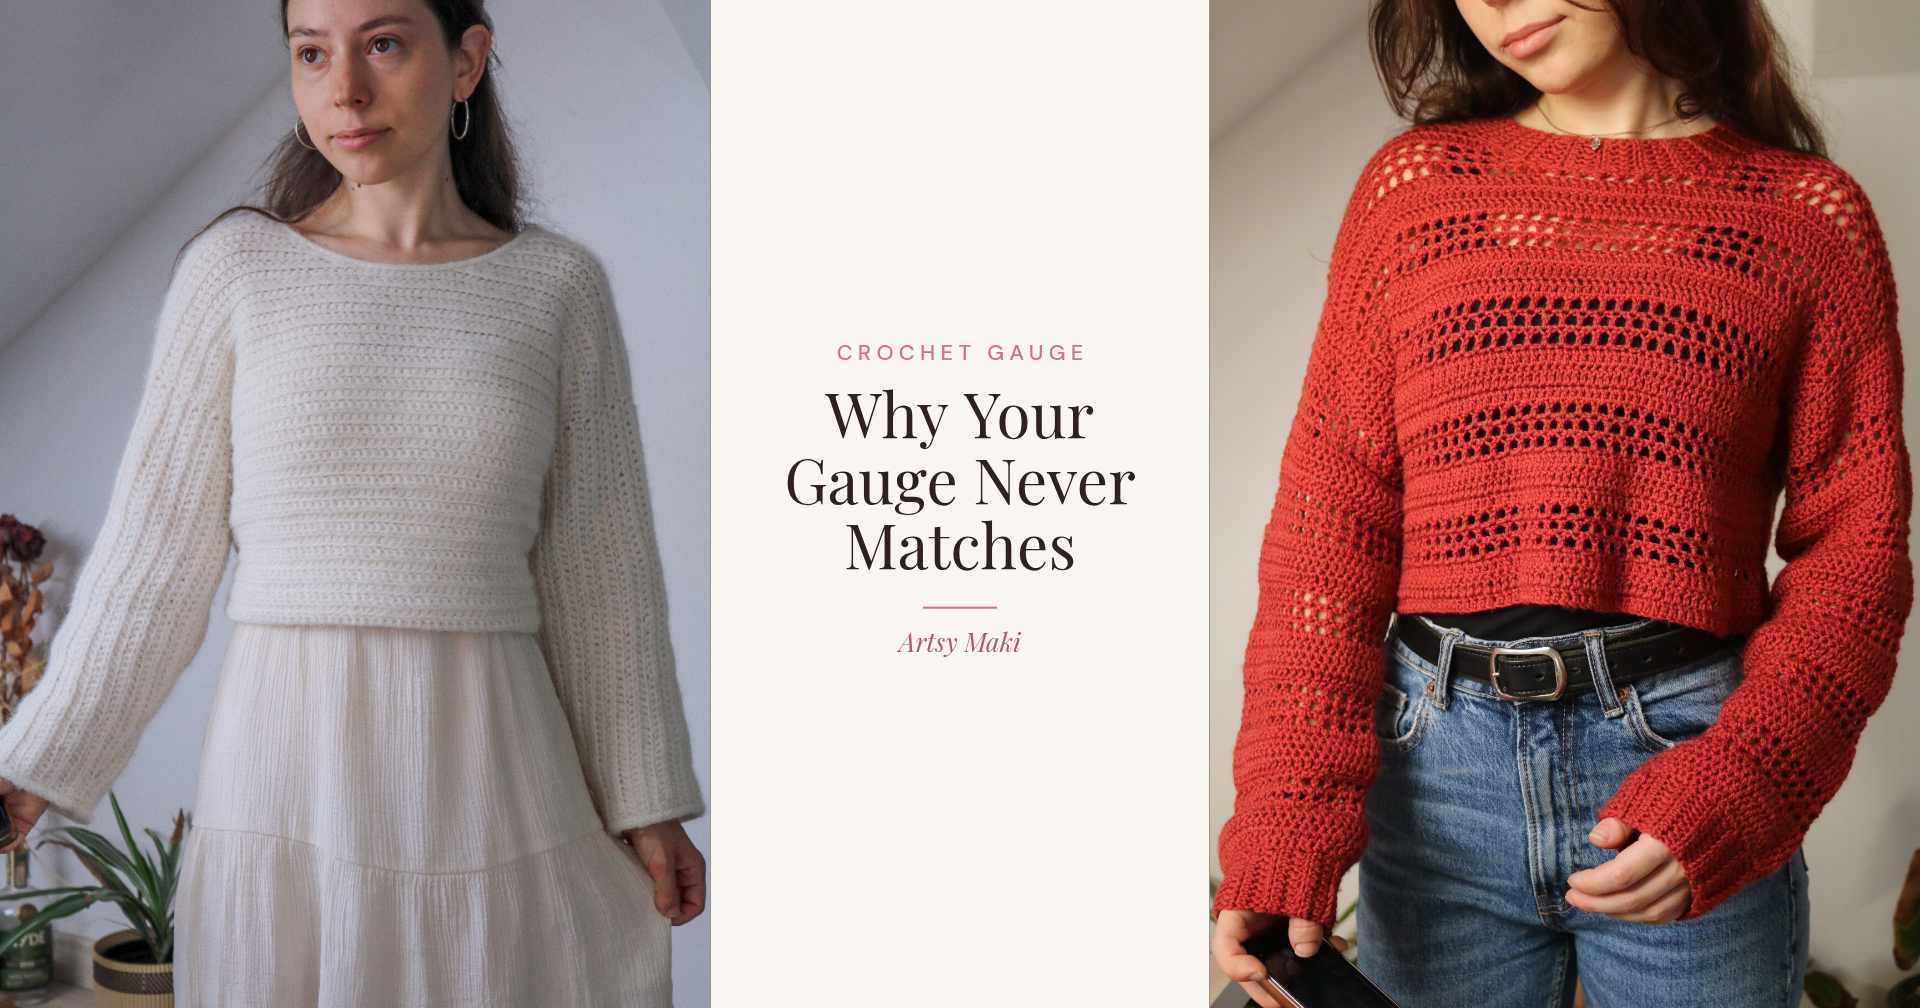
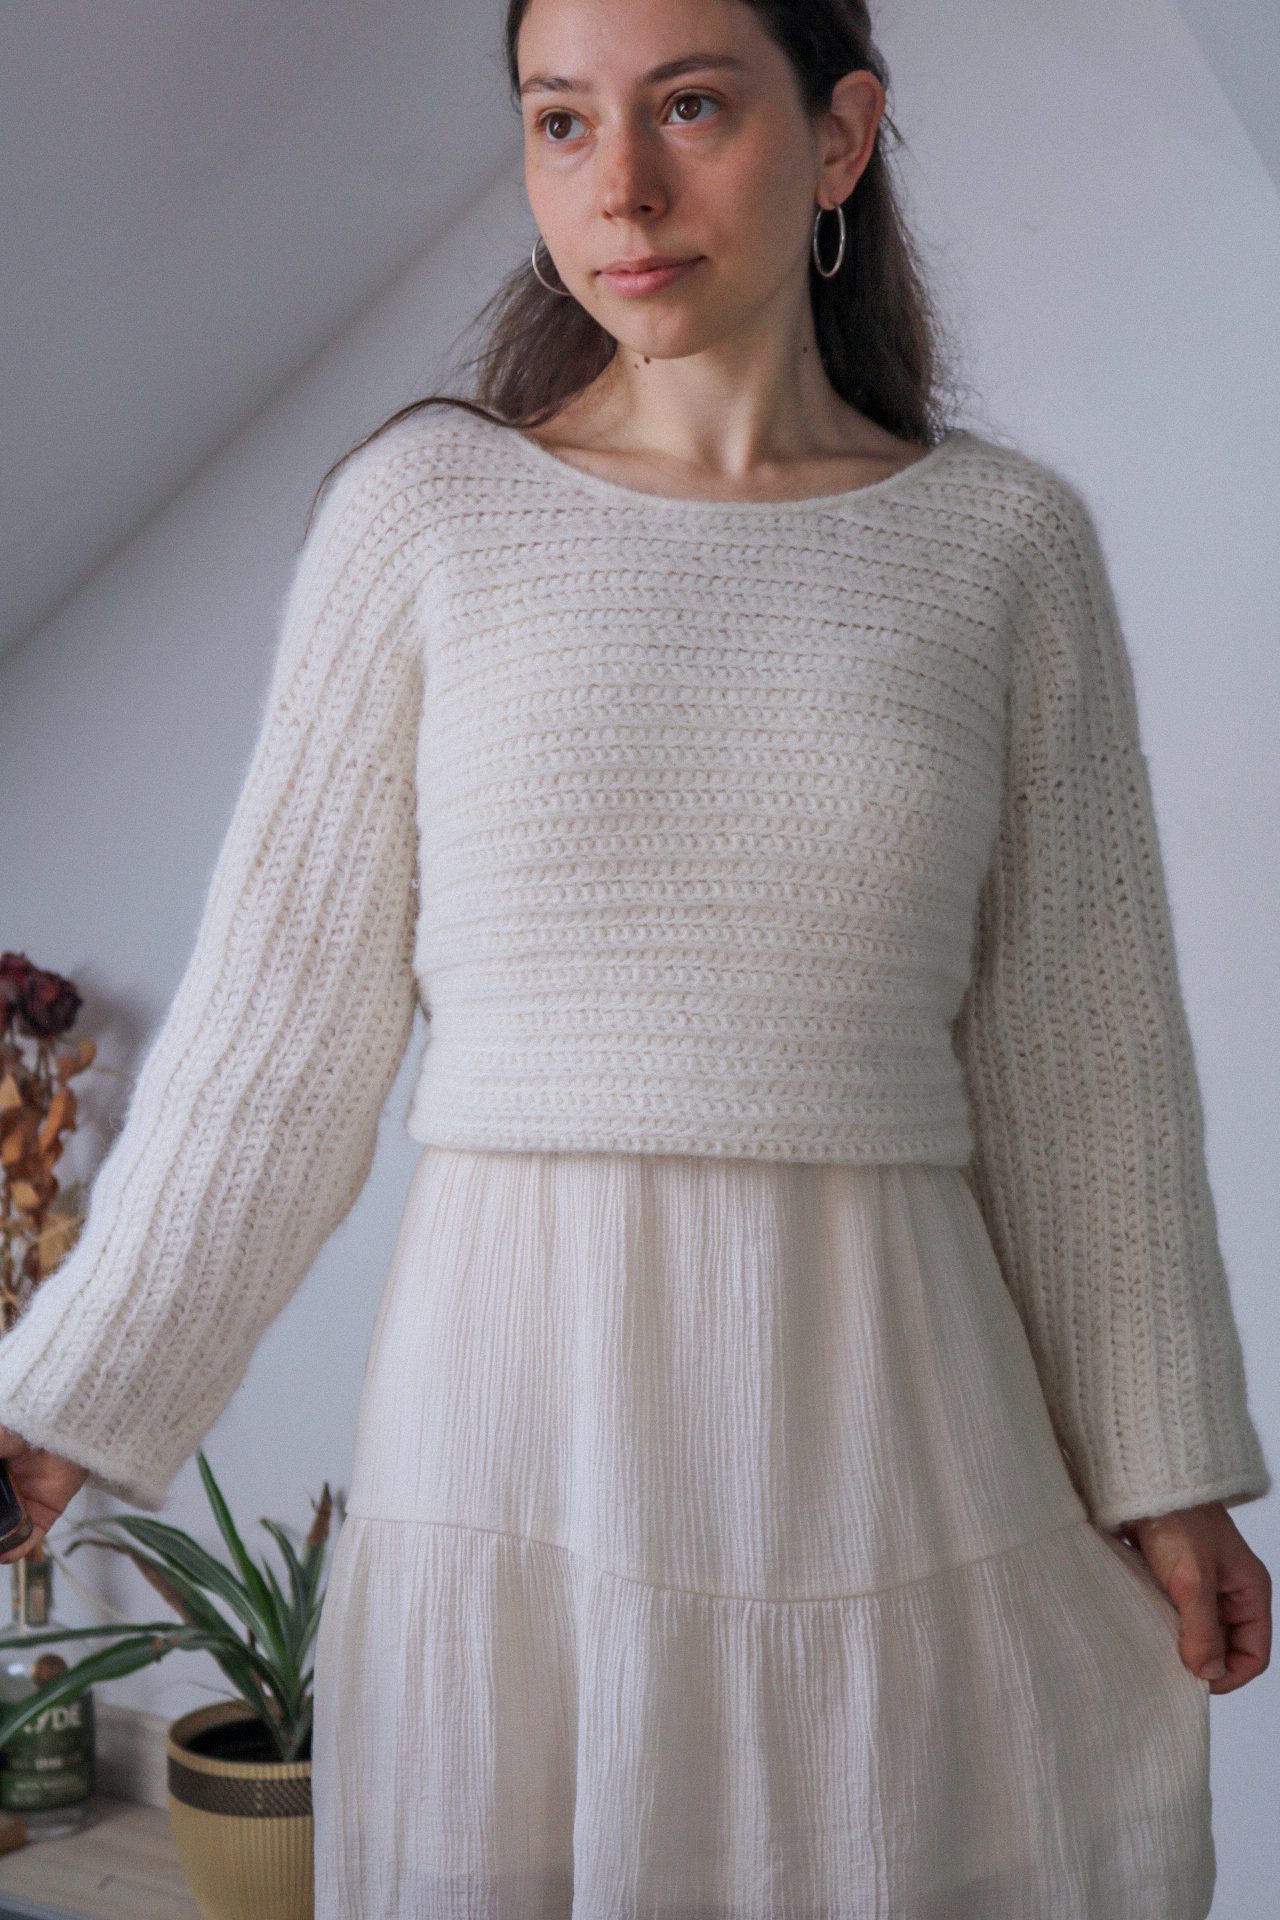
My own patterns are a fair example of how specific it gets. The Claire Sweater gauge is 15 half double crochet and 10 rows to 10 x 10 cm on a 5 mm hook, worked in alternating front loop and back loop half double crochet, which is a ribbed fabric that behaves nothing like plain rows of the same stitch. Swatch that in ordinary half double crochet and the number you get is real, it is just answering a different question.
4. The pattern has two gauges and you checked one
Any pattern that alternates two stitch patterns has two gauges, and they can drift independently.
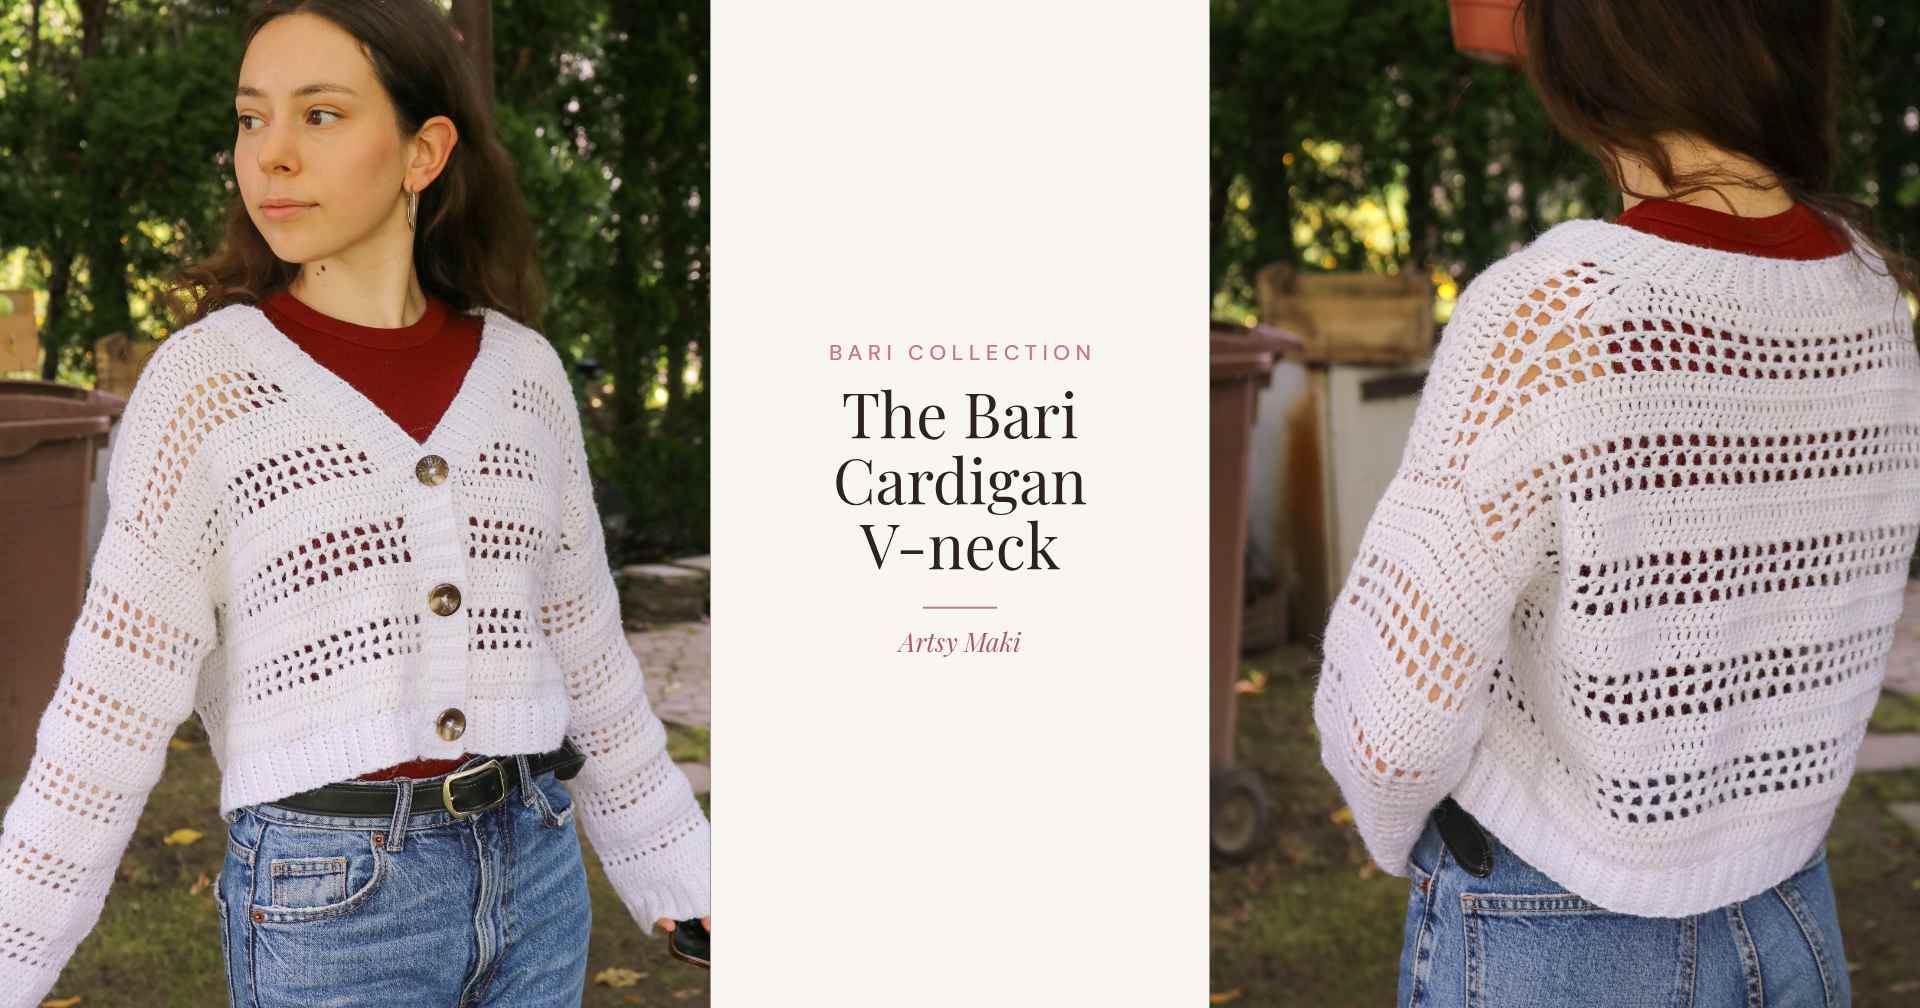
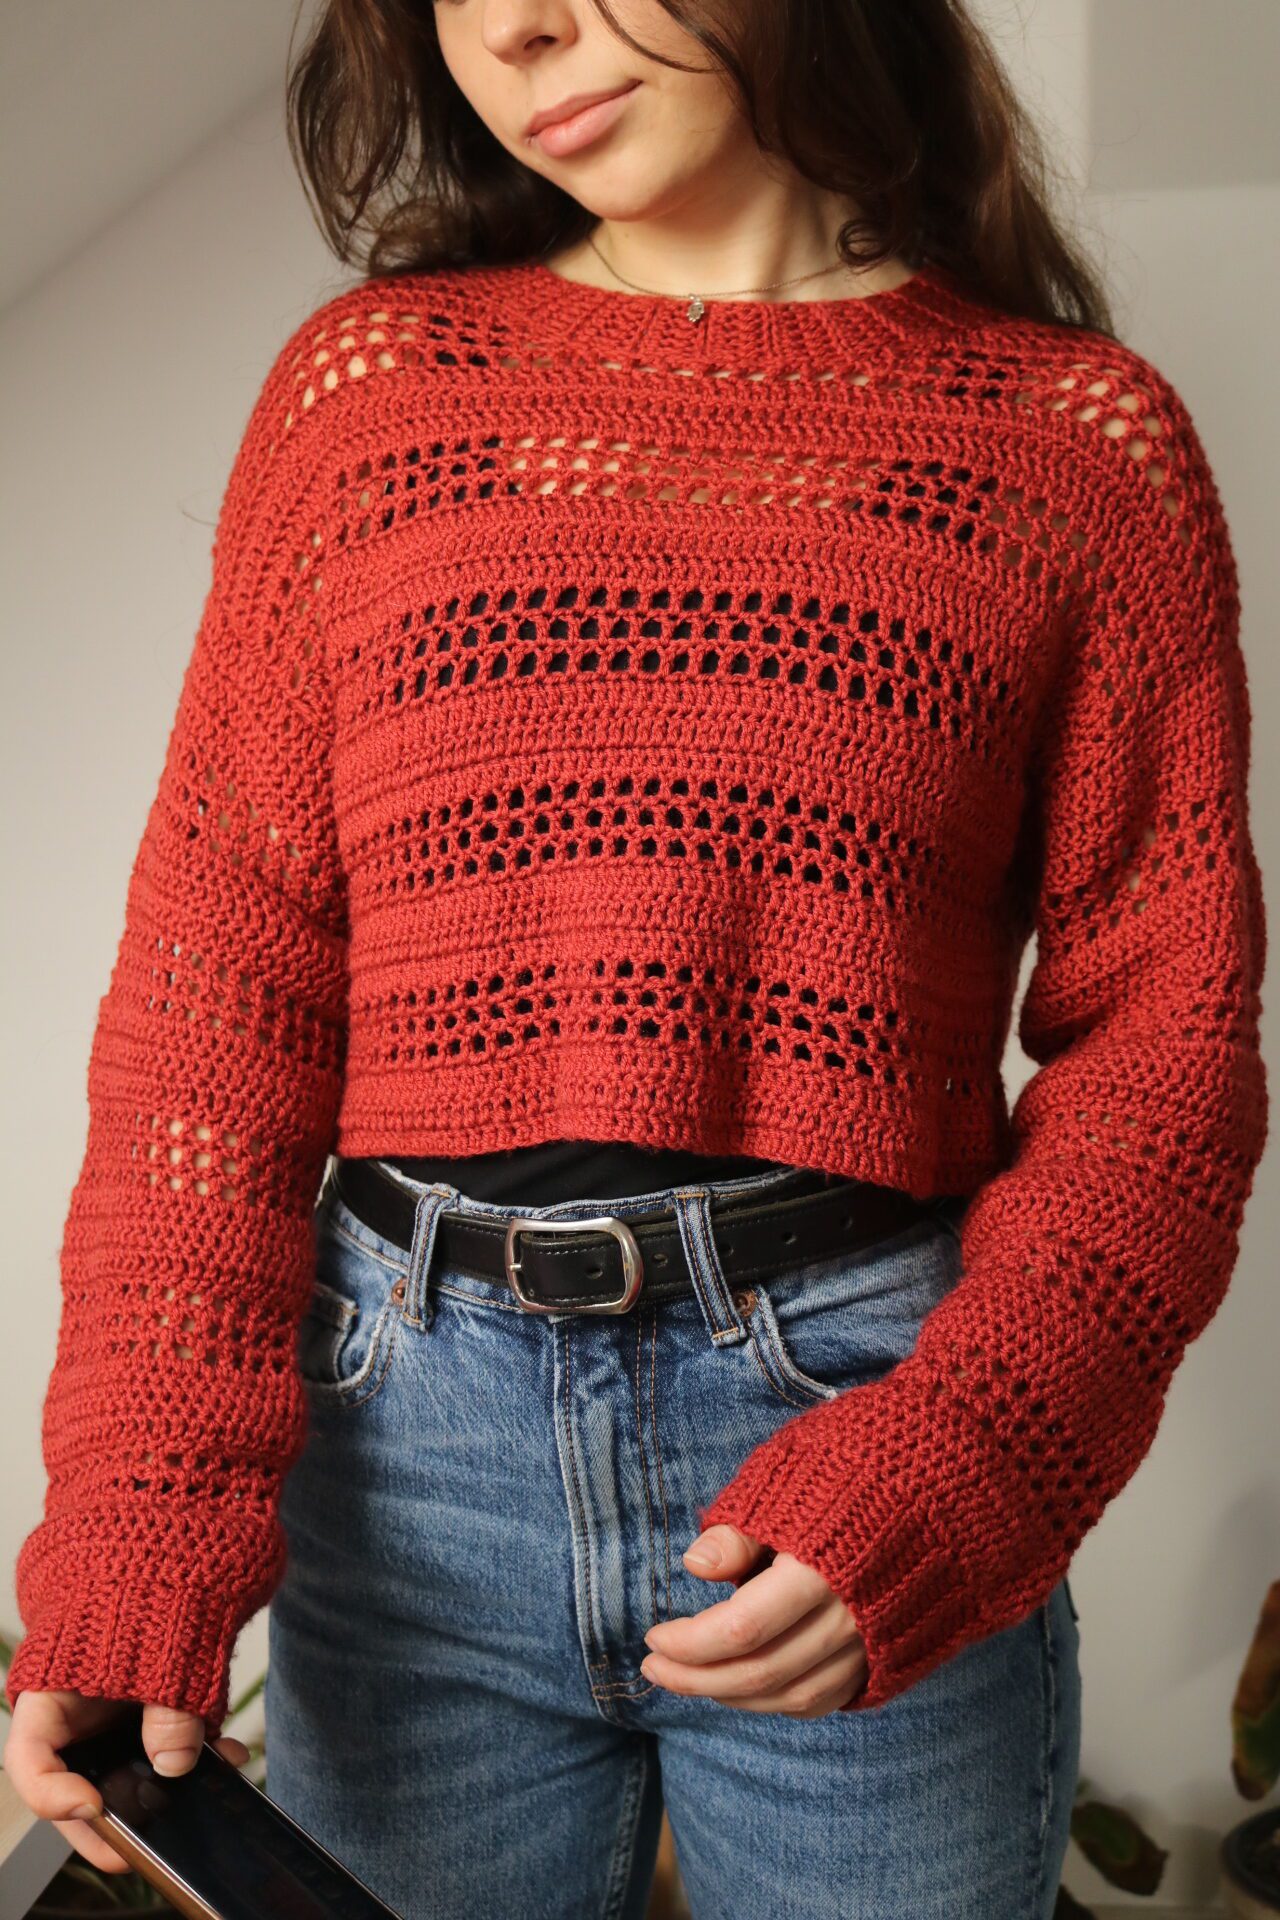
The Bari Sweater gives 19 double crochet and 8 rows to 10 x 10 cm on the solid bands, and 9 mesh squares and 8 rows to 10 x 10 cm on the mesh bands. It is easy to hit gauge on the solid rows and drift on the mesh, because an open stitch gives your hands far more room to be inconsistent in. The two alternate all the way up the body, so a mismatch does not average out. It shows as the stripes bunching or stretching.
5. The yarn moved after you measured it
Blown and chainette yarns are the ones to watch. A blown yarn is a fine tube of fibre with air inside rather than a twisted ply, which is what makes it so light, and it also means it relaxes once it has been worn and washed.
The pattern says it plainly: work your swatch, then wash and dry it the way you intend to treat the finished sweater, and measure it after that. A swatch measured straight off the hook will tell you the wrong thing.
If you are substituting yarn, this is worth knowing about your substitute too. Two yarns can match on weight and metreage and still behave differently here.
6. Your tension is not a constant
Tension moves with how you are sitting, how tired you are and how much attention you are paying. A swatch worked in good light with full concentration is not the same fabric as row 40 of a sweater in front of a film.
There is no fixing this, only accounting for it. Measure again about 15 cm (6 in) into the actual project, in the actual conditions you crochet in. If it has drifted, you have lost 15 cm of work rather than a yoke.
How to measure so the number is worth trusting
Most gauge disagreements are measuring disagreements. Here is the method, in order.
- Work the swatch in the pattern stitch, with the hook and yarn the pattern names, and flat or in the round to match how the project is worked. Many crocheters work tighter in unturned rounds than in turned rows, and a flat swatch will not warn you.
- Make it bigger than you want to. For anything small, 15 x 15 cm (6 x 6 in) is plenty. For a garment, make it about 20 cm (8 in) wide. That is roughly an hour of work against forty for the sweater, and it is the single change that fixes the most swatches.
- Block it the way you will treat the finished thing. Wash it if you will wash the garment, pin it out if you will pin it, and let it dry completely before you touch it.
- Lay it flat and do not stretch it. Not held up, not on your lap, not pinned taut. Flat on a table, left alone for a minute first.
- Measure across the middle, using a rigid ruler. Stay well away from the foundation chain, the turning chain edge and the outside rows. Those stitches are never representative and they are exactly what a small swatch forces you to include.
- Count over 20 cm (8 in) and halve the answer. If you count to the nearest half stitch over 10 cm, your reading is already ±0.5 stitches, which the table above says is over 3 cm on a chest. Count over twice the distance and the same half stitch of uncertainty becomes ±0.25 per 10 cm. You have halved your error for free.
- Do rows the same way. Turn the ruler, count over 20 cm of height, halve it.
Count partial stitches as partial. If the ruler lands halfway through a stitch, that is a half, not a whole and not nothing.
Getting to the right hook in one jump, not four
The standard advice is to go up a hook size if you have too many stitches and down if you have too few, then swatch again, and repeat. That works and it is slow. You can usually land it in one.
hook you need = hook you used × ( your stitches ÷ pattern stitches )
Say the pattern asks for 15 stitches per 10 cm on a 5 mm hook and you got 17. You are tight, so you need a bigger hook:
- 17 divided by 15 is 1.13
- 5 mm × 1.13 is 5.7 mm
- The hooks that exist near that are 5.5 mm and 6 mm, so try 5.5 mm first
The other direction works the same. Getting 13 stitches where the pattern wants 15 gives you 5 × 13 ÷ 15, which is 4.3 mm, so try 4.5 mm.
Why it is an estimate and not an answer
Two things are worth being honest about here.
The formula runs slightly high, because part of every stitch is the thickness of the yarn itself and that does not change when you change hooks. So the real gauge shift is a little smaller than pure proportion predicts, which is why I start at the smaller of the two candidate hooks.
And it disagrees with the common rule of thumb, which is that one hook size changes gauge by roughly one stitch per 10 cm. By that rule, going from 17 stitches to 15 needs two sizes, 5 mm to 6 mm. The formula says 5.7 mm. They bracket the answer rather than agreeing on it, and honestly that is the useful part: swatch at 5.5 mm, and if you are still tight, 6 mm is waiting. You have gone from four swatches to two.
How ro change row gauge
This is the part that took me longest to understand, and it is the reason the title of this post says “what actually fixed it”.
If you have ever nailed your stitch gauge, felt pleased, then found your rows are miles out and changing the hook only ruins the stitches you just fixed, you were not doing anything wrong. Stitch gauge and row gauge do not move together, and there is a measured reason why.
Pepper Goose ran the test properly, working the same DK merino across hooks from 3 mm to 10 mm and measuring what changed. Going from the 3 mm to the 10 mm hook increased stitch width by about 83% but row height by only about 70%.
The explanation is in the anatomy of a stitch. The width of a stitch comes from the loops that sit across the top of it, and those are formed on the hook, so they scale with it directly. The height is those same loops plus the post, the vertical bit of the stitch. The post is not formed on the hook at all. It is formed by how far you pull the first loop up before you start working the stitch off.
So the hook controls your stitch gauge. Something else controls your row gauge. That something else has a name.
The golden loop
The golden loop is the first loop you pull up through the stitch you are working into, before you start working the stitch off the hook. Its height is the height of the post, and therefore of the row.
It is not a technique you add. You are already doing it on every single stitch. You have just never been asked to think about it, which is why row gauge feels like something that happens to you.
Dora Does sorts crocheters into three types by what they do with it, and the names are good enough that they stick:
- Riders let the loop sit at about the size of the hook, matching the working loop. Middle of the road row height.
- Yankers pull the loop tight as they go, so it comes out smaller than the hook. Short stitches, and more rows per 10 cm than the pattern expects.
- Lifters raise the loop up and away from the work, so it is taller than the hook. Tall stitches, and fewer rows per 10 cm.
Which one are you?
Do not try to watch your hands, you will change what you are doing the moment you look. Read it off the swatch instead, once your stitch gauge already matches:
- Too many rows in 10 cm means your posts are too short. You are a yanker. Lift the loop higher.
- Too few rows in 10 cm means your posts are too tall. You are a lifter. Let the loop settle smaller.
How to change it
Keep everything else the same. Same hook, same yarn, same tension on the working yarn. The only thing you alter is how high that first loop sits before you complete the stitch.
- Work ten rows deliberately exaggerating it, lifting the loop to about one and a half times the hook if you need taller rows, or settling it snug against the hook if you need shorter ones.
- Measure both gauges again. Stitch gauge should be unchanged. If it has moved, you have changed your working tension too, not just the loop.
- Back off from the exaggeration until the rows land where you want them.
Be realistic about what this costs. After years of crocheting, the golden loop is automatic, and changing it takes active concentration for as long as you are doing it. It drifts back the moment you stop thinking about it, which is another argument for checking your gauge again once you are properly into the project.
When row gauge still will not come
Sometimes it does not, and the right move is to stop fighting it. What matters is whether the pattern’s rows are load bearing, and you can tell by reading it before you start.
- Where the pattern gives a length in centimetres, such as “work until the body measures 30 cm”, row gauge does not matter. Work to the measurement and ignore the row count. You will use a little more or less yarn, and that is all.
- Where shaping is spaced by rows, such as an increase every other row through a yoke, row gauge is doing real work. The depth of a top down yoke is pure row gauge, and if your rows are short the armhole ends up tight no matter how perfect your stitch gauge is. That is the case worth fixing at the loop.
Plenty of patterns are almost entirely the first kind, so read yours before you spend an evening on a number it was never going to use.
Four ways a good swatch still lies to you
- You measured it while it was still damp. A blocked swatch keeps changing until it is dry all the way through, and the last few per cent is the part that moves. Leave it overnight.
- You measured it hanging or held up. Gravity is not a neutral observer. Flat on a table, every time.
- You pinned it out taut to block it. Pinning a swatch stretched gives you the gauge of a stretched swatch. Pin it to its natural shape, or lay it flat and leave it.
- You counted the stitches instead of measuring the fabric. Counting to a round number and then finding the ruler mark is backwards. Set the ruler first, then count what is inside it, halves included.
Questions I get asked
Why is my crochet gauge different from the pattern even with the same yarn and hook?
Because gauge is made by your hands, not by the materials. How you hold the yarn, how much you pull on it and how high you lift the loop are all individual, and none of them are in the pattern. The yarn and hook in a pattern are the designer’s starting point, not a guarantee. Change the hook until you match their number and you are doing it right.
How big should a crochet gauge swatch be?
Bigger than the area you are measuring, with room to spare. For small projects 15 x 15 cm (6 x 6 in) is fine. For a garment make it about 25 cm (10 in) wide so you can measure a full 20 cm (8 in) across the middle and stay clear of the edges, which are always looser or tighter than the body of the fabric.
Do I have to block my gauge swatch?
If you will block the finished piece, yes, and the same way. Some fibres and stitches move a lot in the wash and some barely move, so there is no shortcut percentage you can apply instead. Blown and chainette yarns are the ones most likely to surprise you. If you have never blocked before, my DIY blocking board post covers the setup.
My stitch gauge is right but my row gauge is wrong. What do I do?
Do not change the hook, you will lose the stitch gauge you just got. Change the golden loop instead: the first loop you pull up through each stitch. Too many rows per 10 cm means lift it higher, too few means let it settle smaller. Then check that your stitch gauge has not moved, because if it has, you changed your whole tension rather than just the loop.
Does hook brand matter if the millimetres match?
First make sure they do match. The Craft Yarn Council says to rely on the millimetre marking rather than the letter, because letters mean different things to different manufacturers. Beyond that, hooks differ in throat shape, inline or tapered, and crocheters report gauge differences in both directions from switching. The sources genuinely do not agree, so the safe answer is to swatch with the hook you are going to use for the project rather than the one that happened to be nearest.
What if I cannot get gauge with any hook?
Two hook sizes in either direction is about as far as you can go before the fabric stops being the fabric the designer intended. A hook too big for the yarn gives you gaps and no structure, a hook too small gives you cardboard. If you are still two stitches per 10 cm out at that point, the problem is the yarn, not your hands, and you need a slightly heavier or lighter one.
Do I need to swatch for a blanket or a scarf?
For fit, no. A rectangle that comes out 6 cm wider is still a scarf. For yarn, yes, and this is the part people get caught by: working looser than the pattern means more metres per row, so you can run out of yarn on a project where size did not matter at all. A quick swatch tells you whether to buy an extra ball.
Does gauge change how much yarn I need?
Yes, in both directions at once. A looser fabric uses fewer stitches to cover the same area but each stitch eats more yarn, and a tighter fabric does the reverse, so the totals do not cancel out neatly. If you are planning a garment, my post on how much yarn a sweater takes goes through the Ravelry method for getting a real number from other people’s finished projects.
If nothing is matching at all
One last thing worth checking before you blame your hands. If you have substituted the yarn, or you are holding two strands together to make up a weight you do not own, the fabric you are swatching may simply not be the weight the pattern was written for. No hook fixes that.
The yarn weight calculator works out what you have actually got from the ball bands, including held strands, and gives you a hook range to start from. If that range does not contain the hook the pattern names, you have found your answer and it was never your tension.
Start from the right weight
Put in your ball bands and it gives you the real combined weight, a hook range and a gauge estimate. Grams or ounces, metres or yards. Free, and it runs entirely in your browser.