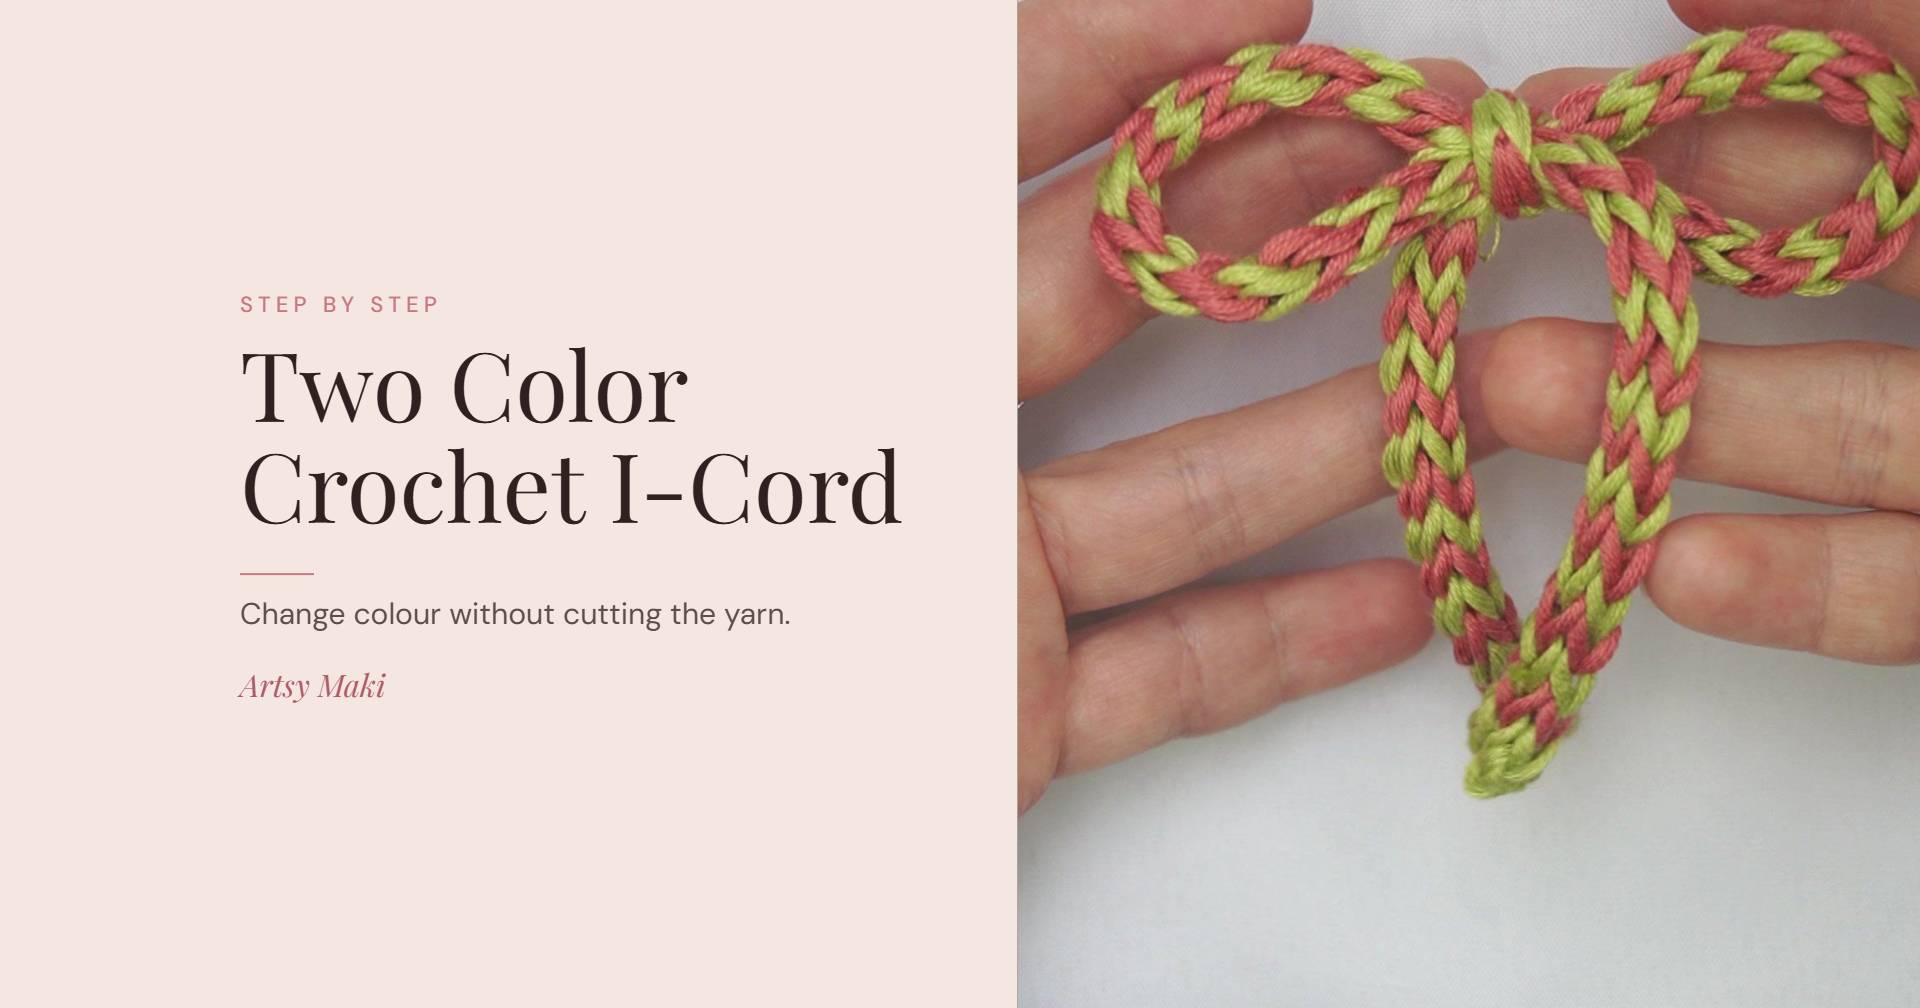
A two-colour i-cord is one of those little techniques that ends up being useful everywhere. It makes a rounded, knit-look crochet cord, and alternating the yarn colours gives it a woven-looking pattern without a complicated stitch repeat. I used mine for a bow, then made a whole garland of them.
This two color crochet i-cord tutorial follows the three-loop method in my video. The photos show each part of the colour change, including the slightly awkward moment when two loops come off the hook. Once that movement makes sense, the rest is the same small repeat.
The short version
Chain 3 in colour A and pick up 2 loops: 3 loops on the hook. Hold 2 loops off the hook, work the remaining loop with colour B, then pick up and work each held loop separately. You are back to 3 loops. Switch to A for the next row and keep alternating. No turning chain, and no cutting the yarn between rows.
Jump to the photo tutorial · 4-stitch version · More than two colours · Troubleshooting
What is a crochet i-cord?
An i-cord is a narrow cord made from a small number of live loops. Instead of finishing a normal crochet stitch through two loops, you draw a new loop through each existing loop individually. Working across the same loops repeatedly draws the fabric into a rounded cord.
You can make one with knitting needles too, but this tutorial uses a crochet hook. Three live loops make the version shown here; four give you a wider cord. The number of colours and the number of stitches are separate choices: a three-stitch i-cord can use two, three or more colours.
What you need
- Two colours of smooth yarn in a similar thickness. I use green for A and pink for B in the photos. Small leftovers are ideal for practising.
- A crochet hook suited to your yarn. Start with the yarn label’s suggested size and adjust for a cord that is firm but easy to work.
- Scissors and a tapestry needle for finishing.
- Optional: a spare small hook or stitch holder to keep the removed loops safe.
Smooth, light or medium yarn make the loops much easier to see. Fuzzy yarn and a very tight hook make the learning stage harder. If your two yarns differ a lot in thickness, the cord may look uneven; my guide to substituting yarn explains what to compare beyond the weight name on the label.
Terms: US crochet terminology.
- ch = chain;
- st = stitch;
- yo = yarn over.
- A live loop is simply a loop you still need to work into. .
Two color crochet i-cord: the photo tutorial
Leave tails long enough to weave in comfortably, around 15 cm / 6 in. Keep both balls attached throughout the two-colour repeat. The inactive strand rests behind the work until it is needed again.
1. Make a slip knot with both colours
Hold A and B together and make a slip knot. Put the doubled loop on the hook and tighten it gently. Although there are two strands in it, treat this as one starting loop. The following chains are worked with A only; B rests behind the work.

2. Chain 3 with colour A
Using A, chain 3. Keep the chains loose enough to insert the hook into them. The loop currently on the hook is your working loop; it is not counted as one of the three chain stitches.

3. Pick up 2 loops
Insert the hook into the second chain from the hook, yarn over with A and pull up a loop. Leave it on the hook. Insert the hook into the next chain, yarn over with A and pull up another loop. You now have 3 live loops. Keep them separate rather than pulling a new loop through all of them.

4. Take 2 loops off the hook and hold them
Pinch the two loops nearest the hook tip with your non-hook hand, then slide the hook out of those two loops. Leave one loop on the hook. Keep holding the removed loops until you work them again; pulling the working yarn at this point can shrink them or pull them out.

Maki’s tip
If holding two loose loops feels fiddly, slip them onto a spare small hook or stitch holder. Transfer them back one at a time. Keep their order and orientation the same so you do not twist or cross them.
5. Change to colour B
Let A rest behind the work. Bring B into your working position, yarn over and draw B through the single loop still on the hook. There is now one B loop on the hook, and you are still holding the other two A loops.

6. Work the held loops, one at a time
Pick up the held loop nearest the working loop first. Yarn over with B and draw a new loop through that held loop only; leave the new loop on the hook. Repeat with the second held loop. You should finish with 3 B loops on the hook.


7. Switch back to A and repeat
Hold two loops off the hook again. Pick up A, draw it through the remaining loop, then pick up and work the two held loops individually with A. Continue alternating one complete row in B and one complete row in A until the cord is the length you want.

Do not turn the work or add a chain between rows. After every complete row, count the loops: there should still be three. The first few rows can look flat or untidy; give the cord a little length before judging its shape.

8. Fasten off and weave in the ends
When you reach your length, finish a full row so all 3 loops are on the hook. Yarn over with the active colour and draw through all 3 loops to close the end. Cut the yarn, leaving a weaving-in tail, and pull that tail right through the last loop. Cut the inactive colour too. Weave each tail through the inside of the cord, changing direction to help it stay put.
If the cord will be tied into a bow, finish and weave in the ends before tying. For a drawstring or strap, make a small sample first: yarn, tension and use can all change how much the cord stretches.
How to make a 4-stitch crochet i-cord
Use the same method with one extra live loop. The photos above show the three-stitch version; the changes for four stitches are:
- Chain 4 with A. Pick up a loop in the second, third and fourth chains from the hook. You have 4 loops.
- Hold 3 loops off the hook, leaving one on it.
- With B, yarn over and draw through the remaining loop. Pick up and work each of the three held loops separately with B. You are back to 4 loops.
- Repeat the row with A, then keep alternating colours. Fasten off by drawing through all four loops at the end.
A spare hook is especially helpful when you are holding three loops. Four stitches make a wider cord in the same yarn, but the final thickness still depends on hook size and tension. If you make a lot of cord, the same count works on an i-cord machine too.
Can you use more than two colours?
Yes. The simplest way is to use one colour for an entire row and introduce the next colour at the start of the following row. You still keep three live loops for the narrow cord, or four for the wider version. You do not need to add a stitch for every new colour.
Three colours: A, B, C
Set up the cord with A. Work one complete row in B, one in C, then one in A. Repeat B–C–A. Introduce C with a tail to weave in, holding the tail steady while you work its first row. Keep the unused strands behind the work and carry them loosely until their next turn.
The pattern can shift around the cord as you work. Make a short swatch to see how your colour order and yarns look, rather than expecting the same placement as the two-colour sample.
Four colours or longer colour blocks
For four colours, use the same idea with A–B–C–D. There are more inactive strands to manage, and the distance between uses is longer. Pause regularly to untangle them and check the carried yarn at the back. It should not pull the cord shorter or leave long loose loops.
For colour blocks, work several complete rows in one colour before changing. If you will not use a colour again soon, cut it and weave in the ends instead of carrying it a long way. This creates more ends, but avoids a long floating strand. The extra-colour ideas are variations on the same method; they are not shown in the two-colour photos.
Two strands together?
Holding two colours together for every stitch gives you a marled cord and a thicker combined yarn. Alternating colours row by row, as in this tutorial, keeps the colours separate in the stitch pattern. Choose the look you want before starting.
Troubleshooting
My loops disappear when I take the hook out
The working yarn is being pulled while its loop is unsupported. Hold the removed loops at their bases, keep the yarn relaxed, or use a spare hook. If one comes out, stop straight away and recover it before continuing. Check that you have three loops again at the end of the row.
I keep ending up with two loops instead of three
A new loop has probably been pulled through two old loops at once, or one held loop has been missed. Each old loop needs its own new loop. Go back to the last complete row and work through them individually; adding an extra chain changes the structure rather than repairing the missed loop.
One colour is much tighter than the other
Make the first loop after a colour change the same height as the other loops on the hook. Pulling the new colour hard can pinch the change point and make the cord kink. Check the inactive yarn too: it needs enough slack to travel to its next row. If your tension keeps drifting, my crochet gauge guide has more on changing the way the yarn moves through your hands.
The cord has a gap at the back
Check that you are not turning between rows, that the held loops go back in the same order, and that the first loop after each change is not being stretched away from the others. A little rolling between your fingers helps the fabric settle, but it will not fix a missing stitch. Test a smaller hook if the entire cord feels loose and open.
The yarns keep tangling
Keep the balls in separate bowls or on opposite sides of your lap. At each colour change, move the new strand consistently from the same side rather than winding it repeatedly around the other. With three or four colours, stop and untwist the bundles before the twist reaches your hands.
Turn your i-cord into a bow or garland
Tie the finished cord into an ordinary bow, then adjust the two loops and tails until they sit how you like. For a set of matching bows, measure your first cord before tying it, note the length, and use that as your guide for the rest. Yarn thickness and the size of your bow make a fixed length less useful than a sample.

To make a garland, arrange the finished bows along a separate cord and sew each one securely to it through the back of the centre knot. Adjust the spacing before fastening the sewing tails. Combining solid-colour bows with a two-colour bow is an easy way to use small yarn leftovers.

- Use a cord as a drawstring, after checking it fits through the eyelets.
- Make ties or decorative straps for a crochet project; test stretch before using one to support weight.
- Try gift ties, bag charms or a bow brooch.
- Keep a short sample with your yarn notes so you can compare colour combinations later.
Questions I get asked
Do I change colour after every stitch?
For this version, change after a full row. Work all three loops with the same colour, then switch for the next row. Changing every individual loop is a different colour arrangement.
Can I use one colour?
Yes. Keep the same working yarn for every row and follow the same hold, draw-through and pick-up sequence. You still need three loops at the end of each row.
Do I need a Tunisian crochet hook?
No. A regular crochet hook with room for three or four loops works. If your hook has a very short shaft, check that the loops can sit comfortably without being pushed onto a much thicker handle.
How much yarn will I need?
There is no reliable single amount for every yarn and cord length. Make a measured sample in your chosen yarn. For a precise estimate, measure how much of each colour the sample uses, then scale to your target length and allow extra for the starting and finishing tails.
Can I make this left-handed?
The loop count and repeat stay the same; mirror the hand movements. Focus on holding the two loose loops securely and working them back in order rather than copying the screen’s left and right.
Where to go next
Start with a short two-colour cord so the movement feels familiar, then try the four-stitch version or add a third colour. For more techniques to use in your next project, explore my stitch tutorials and crochet and knitting patterns. If you make a bow or garland, I would love to see your colour combination, so tag @ArtsyMaki when you share it.
The photos in this tutorial are stills from my own video. If you want the plainer version first, I have a two-stitch i-cord tutorial in one colour.